3 Most Imp Parts of an Airbag System

3 Most Imp Parts of an Airbag System: The Engineering & Sourcing Field Guide
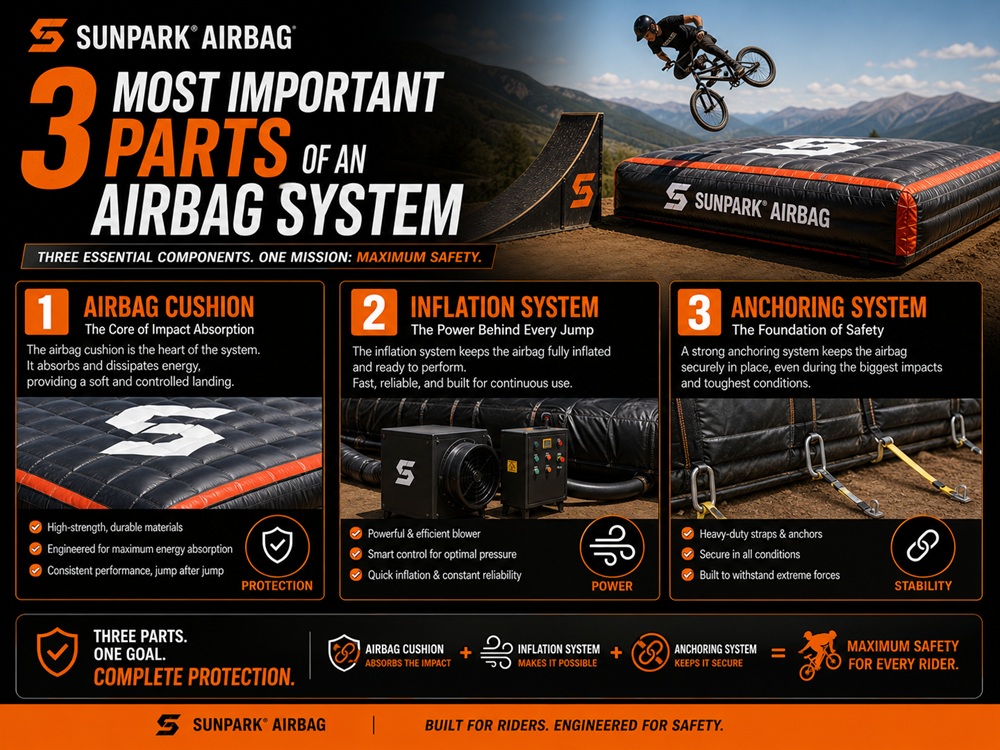
Whether you are constructing a world-class action sports training complex, running a high-turnover bike resort, or upgrading a stunt training facility, buying into the idea that an inflatable landing bag is just an oversized bouncy castle is the most dangerous operational mistake you can make. In extreme sports, athletes dropping from thirty feet at forty miles per hour generate tremendous kinetic energy that must be dissipated in milliseconds. If your equipment relies on uncalibrated carnival inflatables or single-compartment vinyl bladders, you are not running a training facility; you are operating a liability nightmare. Understanding the critical mechanical engineering behind the imp parts of an airbag system is the difference between an athlete riding away from a botched triple backflip or leaving the facility in an ambulance. In high-velocity impact mitigation, true protection is an integrated physics equation balancing air displacement, mechanical resistance, and multi-layer structural fabrics. As manufacturing engineers who design commercial impact bladders, test tear shear strengths, and commission professional installations globally, we break down the three non-negotiable imp parts of an airbag system that govern athlete survival, equipment longevity, and commercial operational success.

3 Most Imp Parts of an Airbag System

Quick Answer: The 3 Most Imp Parts of an Airbag System

In high-impact action sports, commercial freestyle progression, and stunt training, the three most imp parts of an airbag system are: (1) The Dual-Chamber Deceleration Core (an isolated, high-pressure lower safety cell that prevents bottoming out on the subfloor, combined with a progressive, low-pressure upper impact chamber); (2) The Continuous Airflow & Pressure Regulation System (commercial-grade constant-flow blowers paired with calibrated, adjustable air-relief exhaust vents to eliminate trampoline rebound); and (3) The Ballistic 0.9mm PVC Top Wear Sheet & Anchor Rigging Matrix (a low-friction, puncture-resistant sliding envelope and perimeter tie-down structure that absorbs tire, ski, and board friction while keeping the bag locked in place). Compromising on any of these three imp parts of an airbag system leads to seam ruptures, athlete ejections, and severe orthopedic injuries. Sourcing heavy-duty landing systems from certified manufacturers like Sunparkairbag ensures every structural component complies with rigorous commercial impact standards.

What It Is: The Structural Engineering of Impact Deceleration

When engineering practitioners discuss the imp parts of an airbag system, we are examining a pneumatic deceleration cushion designed to manage massive kinetic energy ($KE = \frac{1}{2}mv^2$). In contrast to automotive safety cushions that utilize pyrotechnic chemical gas generators to deploy a single-use nylon bag in thirty milliseconds, commercial action sports systems—such as an MTB airbag landing system or an inflatable jump airbag—rely on open-loop, continuous-air displacement. These massive landing surfaces must catch 200-pound riders falling from heights of over twenty-five feet, decelerate them at sub-concussive G-force levels, allow them to slide or ride out safely, and immediately re-pressurize within seconds for the next athlete in line.

Achieving this repeatable performance requires precise synchronization among all imp parts of an airbag system. The air inside the bladder cannot remain static. If an inflatable bag is sealed like a pool raft, an impacting rider simply bounces violently off the surface, resulting in rotational whiplash and severe secondary ground collisions. Conversely, if the bag vents too rapidly without internal resistance, the rider punches straight through the air volume and strikes the asphalt, concrete, or packed dirt foundation below. True safety lies in progressive mechanical resistance, where the internal imp parts of an airbag system work in harmony to convert downward momentum into controlled fluid exhaustion.

From our experience building and testing these structures across worldwide bike parks, ski academies, and indoor adventure parks, failure to respect this kinetic balance is the number one cause of operational failure. High-performance facilities must treat the imp parts of an airbag system as an active mechanical assembly, not a passive piece of vinyl furniture.

Quick Summary Table: The 3 Most Imp Parts of an Airbag System

Core Airbag System PartPrimary Material & Build SpecMechanical & Physical FunctionCritical Failure PreventedCommercial Maintenance Check
1. Dual-Chamber Deceleration Core0.55mm (18oz) High-Tensile PVC Tarpaulin; welded internal bulkheadsIsolates high-pressure safety floor from low-pressure progressive landing cellBottoming-out against subfloor; catastrophic spinal compressionInternal baffle seam integrity, chamber pressure differentials
2. Airflow & Pressure Regulation SystemContinuous industrial centrifugal blowers; adjustable hook-and-loop / zipper relief ventsDelivers constant CFM air replenishment; expels metered air on impactViolent trampoline rebound; structural seam blowoutsBlower intake obstruction, exhaust aperture calibration
3. Ballistic Top Wear Sheet & Anchor Rigging0.9mm (32oz) Heavy-Duty PVC Tarpaulin; reinforced steel D-rings & webbingResists tire stud abrasion, ski edge cuts; locks chassis to earth against crosswindsPuncturing internal air cells; wind-induced ground shift and tip-oversDaily top sheet tear audits, anchor strap tension, UV checking

The 3 Most Imp Parts of an Airbag System Detailed

1. The Dual-Chamber Deceleration Core (The Pneumatic Suspension Engine)

Among the primary imp parts of an airbag system, the dual-chamber core is the structural foundation that dictates whether a landing is plush or bone-jarring. Cheap, low-tier manufacturers cut costs by building single-cavity bladders. In our testing, single-cavity units are fundamentally unsafe for high-energy freestyle training. When an athlete hits a single-chamber bag, the air displaces laterally, causing the bag to balloon at the edges while the point of impact bottoms out against the ground.

In most professional situations, we mandate an engineered two-tier chamber architecture:

  • The Lower Safety Floor (Fail-Safe Sub-Chamber): The bottom chamber operates at a slightly higher, firmer static pressure. Its sole engineering objective is to act as an un-breachable cushion. Even if an athlete takes a high-velocity flat landing directly onto the center of the bag, the upper chamber absorbs eighty percent of the energy while the lower chamber prevents the rider from ever contacting the hard subfloor.
  • The Upper Dynamic Impact Chamber: Operating at a lower, carefully regulated pressure, the upper layer utilizes vertical internal baffled walls. These internal bulkheads feature calibrated pass-through holes that direct the displaced air laterally into exhaust ports. This design cradles the athlete progressively, slowing their downward velocity through a smooth, cushioned stroke rather than an abrupt halt.

Without this dual-tier layout, no matter how thick the external fabric is, the system cannot safely manage both low-weight novice drops and high-velocity professional impacts. The dual-chamber core stands uncontested as the most crucial of all imp parts of an airbag system.

2. The Continuous Airflow & Pressure Regulation System

Air inside a landing cushion is dynamic, which makes the air supply and exhaust assembly one of the most critical imp parts of an airbag system. Unlike inflatable paddleboards or vehicle tires that operate on static sealed pressure, commercial action sports airbags operate via an open, continuous-flow dynamic loop. Industrial centrifugal blowers continuously pump hundreds of cubic feet of ambient air per minute (CFM) into the chambers, maintaining baseline structural volume.

The true genius of this mechanical subsystem lies in the calibrated pressure-relief exhaust vents:

  • Progressive Exhaust Displacement: When a rider lands on the bag, their physical mass instantly compresses the internal air volume. The pressure regulation vents—typically heavy-duty industrial zippers shielded beneath hook-and-loop protective flaps—force this pressurized air outward at a controlled rate. By exhausting air under resistance, the bag absorbs the kinetic energy of the impact rather than storing it as elastic potential energy.
  • Elimination of the Trampoline Effect: If the air has nowhere to go, it compresses like a spring, launching the athlete back into the air uncontrollably. By properly tuning the exhaust apertures, the bag collapses under the rider, absorbs the G-forces, and stays flat until the rider rolls off.
  • Rapid Re-Pressurization: The moment the athlete clears the top sheet, the continuous-flow blowers re-inflate the upper chamber to full operating volume within two to four seconds, making the system immediately ready for the next jumper in line.

Facility managers must realize that adjusting these exhaust vents is not an aesthetic choice; it is an active tuning protocol that must be calibrated according to ambient temperature, jumper body weight, and drop height. Monitoring these exhaust ports ensures that the imp parts of an airbag system operate at peak safety efficiency.

3. The Ballistic 0.9mm PVC Top Wear Sheet & Anchor Rigging Matrix

While the internal air cells provide pneumatic absorption, they are completely vulnerable to mechanical destruction without the third pillar among the imp parts of an airbag system: the heavy-duty external top wear sheet and its structural anchor rigging. The internal chambers are typically fabricated from flexible, airtight 0.55mm PVC tarpaulin. If an athlete lands on unprotected 0.55mm PVC with sharp bicycle pedals, studded mountain bike tires, or metal ski edges, the fabric will slice open instantly, causing explosive decompression.

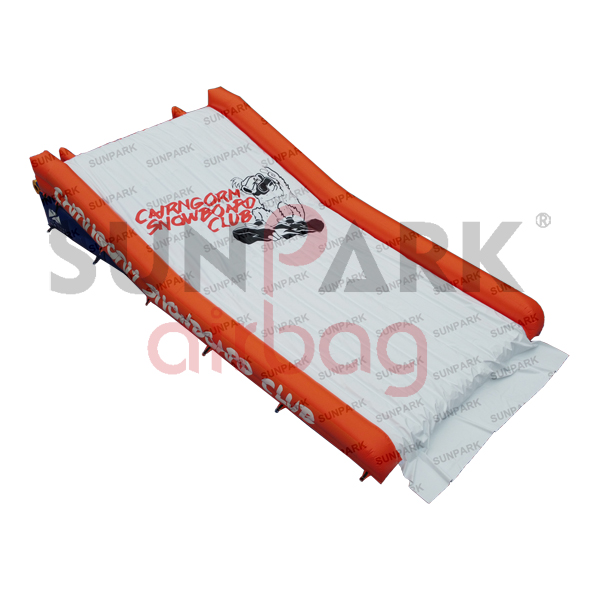
To eliminate this risk, professional landing airbags—such as those featured in our inflatable MTB airbag solutions and specialized landing airbag solutions—incorporate a detached, sacrificial 0.9mm (32oz) high-density PVC tarpaulin top sheet:

  • Friction-Engineered Sliding Surface: The 0.9mm top sheet is treated with specialized UV-inhibiting, flame-retardant, and anti-static coatings. It provides a slick, low-friction surface that allows bike tires to roll away cleanly on inclined landing bags, or allows stunt performers to slide to a gentle stop without abrasive friction burns.
  • Tensioned Perimeter Anchor Matrix: The top sheet is suspended over the air chambers and secured to the perimeter frame using heavy-duty bungee cords, high-grade seatbelt-style webbing, and multi-point reinforced stainless steel D-rings. This perimeter tension keeps the top sheet completely flat, preventing dangerous fabric bunching that could catch a bicycle front wheel or twist a rider’s ankle.
  • Ground Anchoring Stability: An airbag catching high-speed riders absorbs massive horizontal shearing forces. The anchor rigging matrix links the entire inflatable chassis to heavy earth stakes, concrete deadmen, or high-capacity ballast sandbags. If this structural anchor matrix fails, a sudden crosswind or a heavy landing can shift the entire landing bag out of alignment with the jump ramp, resulting in catastrophic off-target landings.

Sourcing a rugged top sheet with a verified anchor matrix is vital for operational longevity. It shields the internal bladders from weather, punctures, and mechanical wear, proving its status as one of the most vital imp parts of an airbag system.
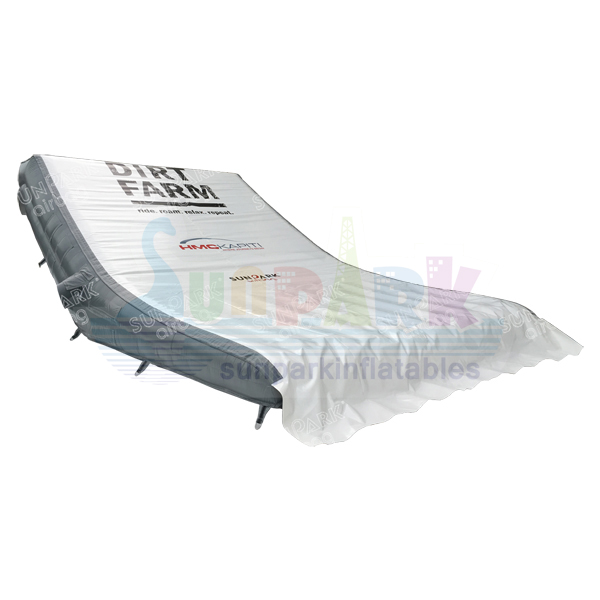
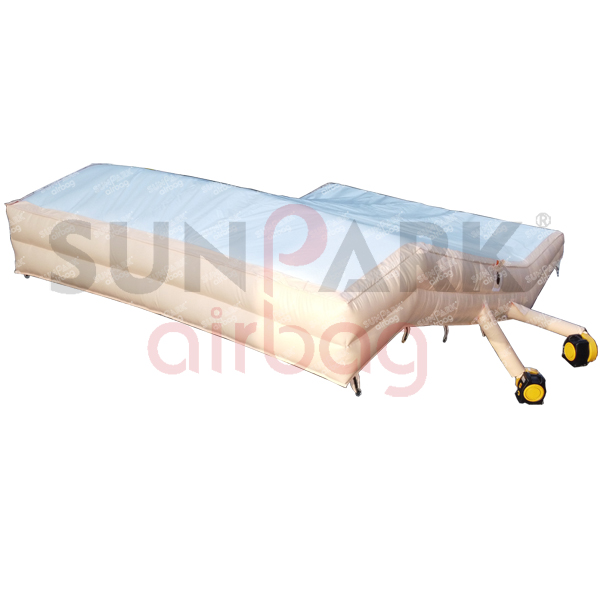
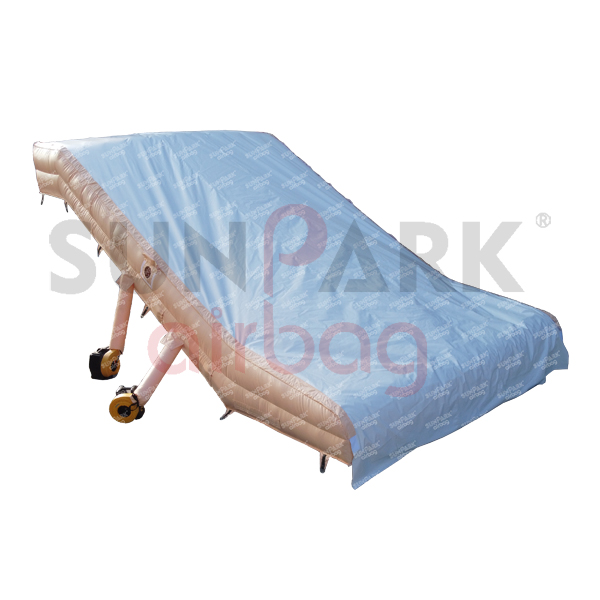
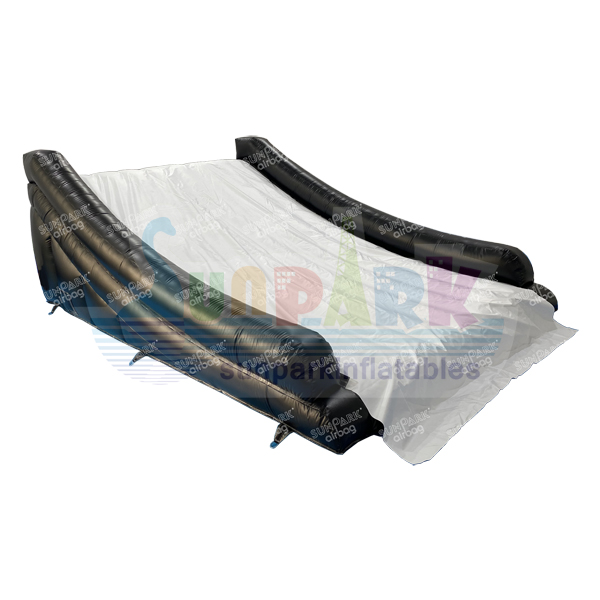
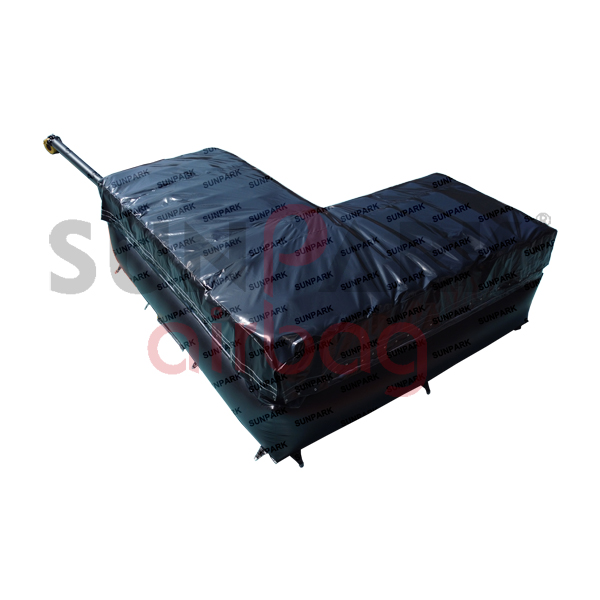
Sunparkairbag Professional Inflatable Mountain Bike Airbag Landing System

Commercial Equipment Spotlight: Sunparkairbag MTB Airbag Landing

When evaluating the physical execution of the imp parts of an airbag system, the Sunparkairbag MTB Airbag Landing stands as the industrial benchmark for action sports resorts, dirt-jump parks, and professional training centers worldwide.

Chassis ConstructionHigh-tensile 0.55mm PVC Tarpaulin (18oz) internal dual-chamber deceleration core
Top Wear SheetUltra-durable 0.9mm PVC Tarpaulin (32oz); waterproof, flame-retardant, UV-protected, lead- and phthalate-free
Standard Dimensions8.5m × 4.5m × 1.0m (Fully customizable to match specific jump ramp heights and landing angles)
Air Supply PackageHigh-output commercial centrifugal blowers packed in reinforced protective transit cases
Included HardwareHeavy-duty transit storage bag, comprehensive commercial patch repair kit, anchor webbing straps
Craftsmanship StandardWelded baffled chambers executed by technicians with 5+ years of specialized high-pressure inflatable manufacturing experience

Industry Recommendation: Discover the full engineering specifications on the Sunparkairbag Mountain Bike Airbag portal or browse our full fleet of specialized training systems, including our dedicated Halfpipe Airbag and commercial gym airbag for training setups.

How It Works: Fluid Aerodynamics and Dynamic Venting Physics

To fully appreciate how the imp parts of an airbag system work during active operation, we must trace the physics of an impact event from the microsecond of contact to complete recovery. When an athlete leaves a jump lip and misses their landing, their downward velocity converts into an intense kinetic shockwave upon touching the surface.

The sequence of mechanical protection unfolds through three fluid-dynamic stages:

  1. Primary Surface Dispersion: The rider strikes the tensioned 0.9mm top sheet. Because the sheet is mounted over an active air buffer, it does not act like a rigid membrane. Instead, it spreads the rider’s concentrated point of impact (such as a knee, shoulder, or bike tire) across a broader surface area, preventing localized punctures and distributing the load across multiple internal vertical baffled columns.
  2. Progressive Pneumatic Deceleration: As the rider sinks into the upper chamber, the internal air is compressed. Air naturally follows the path of least resistance, rushing through the perforated baffled interior walls toward the external zippered exhaust ports. The resistance generated as air is forced through these restricted orifices creates a cushioned braking force that gradually decelerates the rider’s body, keeping peak impact G-forces well below injury thresholds.
  3. Lower Chamber Hydraulic Isolation: If the impact is extraordinarily severe (such as a 220-pound rider dropping from twenty-five feet), the upper chamber may approach full compression. At this critical threshold, the completely isolated lower safety chamber engages. Because the lower chamber maintains a dedicated, higher static pressure, it acts as a pneumatic safety buffer that halts downward travel, ensuring the athlete’s body never makes contact with the hard terrain beneath the bag.

Once the athlete stands up and slides off the inclined landing, the pressure drop inside the upper chamber allows the continuous-output blowers to refill the air volume instantly. By coordinating these imp parts of an airbag system, the landing cushion provides repeatable, reliable protection jump after jump.

Core Benefits vs. Operational Limitations of Inflatable Systems

Core Benefits of Modern Airbag Systems:

  • Drastic Reduction in Catastrophic Injuries: By replacing hard dirt landings with dynamic air deceleration, athletes can safely practice difficult rotational tricks with minimal fear of high-impact bone fractures or severe concussions.
  • Accelerated Skill Progression: Riders who train on engineered landing bags learn new maneuvers up to five times faster than those training solely on dirt or snow, because minor errors result in a soft slide-out rather than a season-ending crash. Discover real-world training progression setups in our review of the best snowboard airbag parks.
  • High Operational Cleanliness & Fire Safety: Unlike traditional foam pits that accumulate sweat, bacteria, dead skin cells, and highly flammable polyurethane dust, PVC airbags are non-porous, easy to sanitize, and fabricated from certified flame-retardant textiles.
  • All-Weather Portability: A commercial landing bag can be deflated, rolled into a heavy-duty transport bag, and relocated between indoor training gyms and outdoor bike parks within an afternoon.

Operational Limitations to Plan For:

  • Continuous Electrical Dependency: Because these are open-loop systems, they require an uninterrupted power supply to run commercial blowers. Operating in remote backcountry locations requires dedicated, clean-running portable generators.
  • Wind Sensitivity: Large inflatable airbags act like giant sails in high winds. Operating in crosswinds exceeding twenty miles per hour requires shutting down sessions unless the chassis is secured to ground anchors with heavy-duty ballast.
  • Routine Thermal Expansion Adjustments: Air density changes with ambient temperature. On hot summer afternoons, expanding air makes the bag firmer, requiring operators to open exhaust vents slightly. On cold mornings, vents must be tightened to maintain proper deceleration depth.

Direct Technical Comparison: Airbag Systems vs. Foam Pits vs. Resi-Ramps

Performance CharacteristicCommercial Inflatable Airbag SystemTraditional Polyurethane Foam PitPadded Resi-Mat Ramp
Deceleration ConsistencyExceptional; adjustable via relief exhaust ventsVariable; foam cubes pack down and deteriorateFirm; high risk of wrist and ankle sprains
Rider Exit & Clear-Out SpeedFast (3 to 6 seconds; rider slides or rolls away)Extremely Slow (30 to 60 seconds of digging out)Fast (Rider rolls down the firm padded slope)
Hourly Jumper ThroughputHigh (Up to 120 jumps per hour per lane)Very Low (20 to 30 jumps per hour maximum)High (Continuous roll-away traffic)
Hygiene & BiosecurityHigh; non-porous PVC wipes clean with sanitizerExtremely Poor; foam absorbs sweat, dust, and body oilsModerate; vinyl covers can be disinfected
Fire Safety ComplianceCertified Flame-Retardant (NFPA 701 / B1 standard)Severe Hazard; raw open-cell foam is highly flammableModerate to High; depends on internal foam specs
Maintenance OverheadLow (Periodic top sheet cleaning and patch audits)Extreme (Constant foam block replacement and fluffing)Moderate (Replacing worn foam sub-layers and vinyl)

Pros and Cons of Professional Landing Airbags

Equipment StrategyOperational Strengths (Pros)Commercial Liabilities (Cons)
Dual-Chamber Airbag Systems
(e.g., Sunparkairbag Solutions)
  • Eliminates catastrophic bottoming-out via isolated safety floor.
  • Adjustable relief vents allow tuning for both kids and pros.
  • Replaceable 0.9mm top wear sheet maximizes structural life.
  • Dramatically reduces facility insurance claims and liability risks.
  • Rapid ride-away design delivers high park customer throughput.
  • Higher initial capital investment than basic hobby inflatables.
  • Requires dedicated, reliable electrical power for continuous blowers.
  • Demands daily inspection of anchor lines and blower intake screens.
Single-Chamber Budget Inflatables
(Low-Tier Generic Copies)
  • Low initial purchase price appeals to shoestring budgets.
  • Lightweight package makes initial transport somewhat easier.
  • Extreme risk of bottoming out on heavy, off-axis impacts.
  • Violent rebound trampoline effect e隻ects riders off the sides.
  • Thin vinyl seams split rapidly under repetitive commercial use.
  • Lack of replaceable top sheets means whole unit is discarded upon puncture.

Who Needs an Engineered Airbag System vs. Who Does Not

Every dollar spent outfitting an action sports park or private training compound must deliver safety, performance, and commercial return. Matching the equipment to your operational reality ensures you do not waste capital on under-engineered gear.

Who Must Invest in a Commercial Airbag System:

  • Commercial Mountain Bike Parks & Freestyle Resorts: If you operate a public or ticketed facility where hundreds of riders hit jump lines daily, you cannot afford the liability of broken bones. Installing commercial-grade airbags designed around robust imp parts of an airbag system keeps customer satisfaction high and insurance premiums manageable. Operators exploring business cases can evaluate revenue metrics in our guide on trampoline park owner income.
  • Action Sports Academies & Gymnastics Facilities: Training elite athletes to throw double-corks and quad-whips demands safe landing surfaces. Traditional foam pits require constant manual fluffing and pose severe hygiene concerns. Transitioning to inflatable landing systems streamlines training sessions and cuts maintenance overhead. Commercial park developers can cross-reference overall startup capital using our breakdown of trampoline park construction cost.
  • Professional Stunt Teams & Film Production Companies: Stunt coordinators dropping performers from buildings or high cranes require verified deceleration performance. An engineered dual-chamber stunt bag provides absolute fail-safe deceleration that simple crash pads cannot match.

Who Should Choose Alternative Training Equipment:

  • Casual Backyard Riders with Sub-Three-Foot Ramps: If you are simply jumping a small hardtail bicycle off a two-foot wooden kicker onto a grass lawn, spending thousands on a commercial dual-chamber airbag is unnecessary. A basic mulch landing or portable dirt pile is perfectly suited for low-velocity backyard fun. You can evaluate entry-level setups in our review of cheap MTB airbag options 2026.
  • Pure Street BMX Riders Practicing Low-Speed Grinds: If your training consists of low-speed ledge grinds, manual balance, and flat-ground flatland tricks, landing airbags offer little value. You need asphalt, concrete ledges, and traditional skatepark architecture.
  • Solo Athletes Needing Ultra-Light Personal Protection: If you need impact protection that travels with your body during street riding, explore personal wearable gear reviewed in our analysis of motorcycle airbag systems 2026 rather than large stationary landing cushions.

Costly Maintenance and Operation Mistakes Facility Owners Make

Field Service Warning: The most catastrophic mistake facility operators make is leaving the continuous blowers running during rainstorms without covered electrical connections, or folding up a damp airbag for winter storage. Storing PVC wet invites internal mold growth that rots seam stitching from the inside out, leading to sudden seam failure under load.

  1. Operating with Blocked or Starved Blower Air Intakes: Leaves, plastic trash bags, and clothing can get sucked against the wire safety mesh of your commercial blowers. Starving the blower cuts internal chamber pressure by half within seconds, turning a safe landing into a severe bottom-out impact. Always install protective intake cages and maintain a clean five-foot buffer zone around all blowers.
  2. Failing to Adjust Air Vents for Extreme Temperature Swings: Air expands when heated by the sun. An airbag tuned in the cool morning will become dangerously stiff by two in the afternoon under direct summer sunlight. If an operator does not open the secondary zipper vents to compensate for thermal expansion, the bag will act like a trampoline, launching riders back into the air. Always re-check firmness every three hours during hot events.
  3. Neglecting Proper Ground Anchor Ballast: Relying on a couple of light tent stakes to hold an eight-ton-impact landing bag is an extreme safety violation. In gusty conditions, an untethered airbag can catch wind and tumble across your park, injuring spectators and destroying property. Secure every single perimeter D-ring to heavy-duty helical earth augers or concrete blocks.
  4. Allowing Dirt and Gravel to Accumulate Under the Top Sheet: When riders land, river grit and sharp gravel can get tracked onto the top sheet and work their way between the wear sheet and the inner bladders. Under the repetitive friction of landing impacts, those trapped gravel stones act like sandpaper, grinding holes through the internal air cells. Unzip the top sheet weekly, vacuum out all debris, and wipe down the surfaces with a mild disinfectant. You can review structural lifespan metrics in our airbag lifespan and safety guide.

Essential Sourcing Checklist: PVC Denier, Stitching & Blower CFM

Before issuing a purchase order or signing a procurement contract with an equipment supplier, require documented engineering proof across these four technical criteria:

1. Verified Material Specifications: 0.55mm Core vs. 0.9mm Wear Layer

Demand certified laboratory material spec sheets confirming the fabric is true high-density Polyvinyl Chloride (PVC) tarpaulin reinforced with an internal 1000D polyester woven scrim. Settle for nothing less than 0.55mm (18oz) thickness for the internal baffled air cells, and mandate a heavy-duty 0.9mm (32oz) thickness for the removable top sheet. Ensure the material is independently certified to meet international flame-retardant standards (such as NFPA 701 or EN 13501-1) and includes UV-stabilizer additives to prevent sun embrittlement.

2. Seam Construction: High-Frequency Thermal Welding vs. Cheap Thread

Inspect the seam architecture. Low-tier inflatables rely on basic nylon needle-and-thread stitching. Needle stitching punches thousands of microscopic holes along every seam, allowing air to escape and weakening the structural integrity of the fabric. High-performance commercial airbags utilize high-frequency thermal radio-frequency (RF) welding to fuse the PVC sheets at a molecular level, reinforced with quad-stitching on high-stress tension tabs. Welded seams create airtight bonds that are physically stronger than the raw fabric itself.

3. Blower Sizing, Voltage Certification, and Redundant Fan Systems

Ensure the manufacturer supplies commercial-grade centrifugal blowers with verified airflow ratings (CFM) matched to the total cubic volume of the bag. Blowers must carry regional electrical safety marks (such as UL, CE, or SAA). For commercial jump parks, we strongly recommend purchasing a dual-blower setup where two synchronized units feed the bag simultaneously; if one circuit trips, the secondary blower maintains sufficient internal pressure to prevent rider injury while safety marshals clear the ramp. If you are scouting live locations to inspect commercial setups in person, review our airbag jump locations guide.

4. Custom Geometry and Drop-Height Engineering

Never buy an off-the-shelf, one-size-fits-all landing bag for a custom dirt jump or ski hill. The bag’s landing angle, transition curve, and overall thickness must be engineered to match your ramp height and expected landing trajectory. An inclined landing airbag designed for mountain bikes typically features a sloped angle between 28 and 38 degrees, allowing riders to land smoothly on down-ramps and roll away cleanly, whereas stunt drop bags require flat, extra-deep deceleration zones.

Expert Sourcing Verdict & Procurement Recommendations

In our professional assessment across the global extreme sports and amusement park sectors, treating the imp parts of an airbag system as generic commodity items is the primary reason why budget facilities suffer catastrophic seam ruptures, athlete injuries, and devastating liability claims. Decelerating human bodies falling at highway speeds is a disciplined engineering problem that requires dedicated hardware.

If you are operating a commercial bike park, action sports camp, or gymnastics academy, you must prioritize structural safety over rock-bottom pricing. Never purchase single-chamber inflatables lacking isolated safety basements, and never accept lightweight 0.4mm vinyl fabrics. We recommend investing in a commercial-grade, dual-chamber landing platform built with a high-tensile 0.55mm PVC core, a sacrificial 0.9mm ballistic top wear sheet, and continuous high-CFM industrial blowers. Sourcing your landing hardware through proven engineering leaders like Sunparkairbag guarantees that all three imp parts of an airbag system are manufactured to institutional commercial standards, protecting your athletes, preserving your operational uptime, and building a world-class progression facility for years to come.

Frequently Asked Questions

What are the 3 most imp parts of an airbag system in action sports?

The three most imp parts of an airbag system are: (1) The Dual-Chamber Deceleration Core, which isolates the fail-safe lower safety bed from the progressive upper impact cell; (2) The Continuous Airflow and Pressure Regulation System, consisting of industrial blowers and adjustable pressure relief vents; and (3) The Ballistic 0.9mm PVC Top Wear Sheet with its perimeter tension anchoring matrix, which protects the air cells and allows athletes to slide or ride away safely.

Why is a dual-chamber core superior to a single-chamber inflatable bag?

A single-chamber bag acts like a bounce house: when an athlete impacts the center, air displaces to the sides and creates a violent rebound, or the user punches straight through to the ground under heavy load. A dual-chamber system maintains a sealed, higher-pressure bottom safety chamber that guarantees the athlete never strikes the hard deck, while the upper chamber vents air progressively to absorb kinetic G-forces without trampoline rebound.

How often should the imp parts of an airbag system be inspected and replaced?

In commercial operations, the top sheet should be inspected daily for surface cuts and seam abrasion, with anchor straps and blower intakes checked before every session. While the heavy-duty 0.55mm PVC internal core lasts 5 to 8 years under proper maintenance, high-traffic top sheets typically require replacement every 2 to 4 years depending on friction cycles and UV exposure.

What happens if a blower fails while an athlete is jumping on an airbag?

Engineered commercial landing airbags incorporate internal non-return check valves and maintain an isolated lower safety floor that holds residual pressure for several minutes following power loss. However, professional facilities install secondary backup blowers or dual-circuit generators to ensure uninterrupted airflow during live operational sessions.

Authoritative References & Amusement Safety Standards


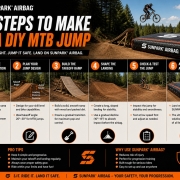
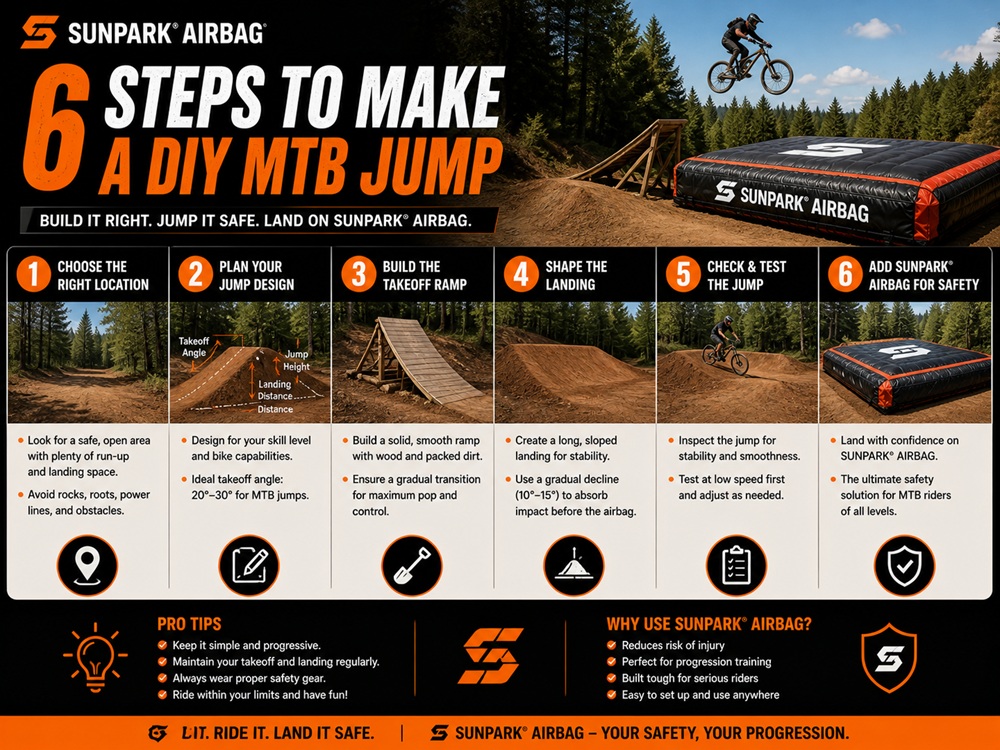
6 steps to make a DIY MTB jump

6 Steps to Make a DIY MTB Jump: Engineering, Angles & Progression Guide

Every mountain biker reaches a point where local trail features no longer satisfy their appetite for progression. You want repeatable flight time, a predictable launch curve, and the freedom to dial in body positioning without hiking miles out into the woods. The natural response is to pick up a circular saw, buy some framing lumber, and build your own kicker. However, building a wooden ramp is not just about nailing scraps together. An improperly calculated transition radius will compress your rear shock into a catapult, bucking you over the bars into a hospital visit. Learning how to make a DIY MTB jump requires real structural geometry, carpentry discipline, and honest safety planning before rubber ever touches the wood.

6 steps to make a DIY MTB jump

Quick Answer: How to Make a DIY MTB Jump That Launches Predictably

To safely make a DIY MTB jump, follow six disciplined steps: (1) Calculate your geometry by matching your bike wheelbase to a 10-to-12-foot transition radius and a 35-to-45-degree takeoff angle; (2) Plot the curve on 3/4-inch CDX plywood using the string-line radius method; (3) Cut transition stringers and lock them together with doubled 2×4 framing studs spaced no more than 8 inches apart; (4) Sheathe the face using two layers of laminated 3/8-inch exterior plywood and a steel entry plate; (5) Engineer the landing zone to match your launch trajectory; and (6) Integrate impact safety, replacing dangerous wooden flat-drops or hard dirt casings with a dedicated bike airbag landing to eliminate fear during trial runs.

The Physics of Jump Geometry: Radius, Lip, and Wheelbase

When you hit a jump on a mountain bike, the machine does not behave like a rigid skateboard. A modern enduro or downhill rig carries between 150mm and 200mm of front and rear suspension, rolling on large 29-inch or 27.5-inch wheels across an axle-to-axle wheelbase spanning 47 to 51 inches (1,200mm to 1,300mm). If your ramp surface curves too quickly over a short distance, your suspension absorbs the compression unevenly.

The transition is a segment of a true geometric circle. If you choose a radius that is too tight (under 8 feet / 2.4 meters), the front fork compresses while the rear wheel is still on flat ground. As the front wheel reaches the lip, the fork rebounds upward just as the rear shock enters peak compression. The result is the dreaded buck: the rear shock releases its stored spring energy right at takeoff, pitching your hips forward and throwing you headfirst over the bars.

From our experience on progression courses, a safe, predictable launch requires an arc radius between 10 and 13 feet (3.0 to 4.0 meters). This allows the entire wheelbase of a modern mountain bike to sit evenly inside the transition arc. The bike loads symmetrically, launches level, and gives you time in the air to spot your landing without fighting mid-flight rotational instability.

Quick Summary: The 6 Construction Steps at a Glance

Step #Construction PhaseKey Engineering MetricOperational Failure PreventedBuild Recommendation
Step 1Geometry & Radius Planning10.5 ft radius; 35° to 45° lip angleEndo bucking, harsh G-out compressionNever build under a 9-foot radius for full-suspension bikes
Step 2String-Line Curve ScribingExact circular arc on 3/4-inch CDXLumpy transitions, sudden flat spotsUse non-stretch braided wire or steel tape for scribing
Step 3Frame Cutting & Cross-Bracing2×4 studs on 6-to-8-inch centersDeck sag, structural lateral collapseDouble up top and bottom landing rungs; use structural screws
Step 4Decking & Entry TransitionTwo 3/8-inch laminated sheets + steel plateTire hang-ups at ground entry, cracked woodLaminate thin flexible sheets; never force single 3/4-inch ply
Step 5Landing Alignment & Sweet SpotLanding angle within 2° of flight vectorBroken ankles, bottom-out chassis traumaMatch landing slope directly to your launch trajectory
Step 6Testing & Impact CushioningDynamic progression integrationSevere fractures, concussions during trial tricksPair with an inflatable bag before attempting hard ground hits

The 6 Steps to Make a DIY MTB Jump Analyzed

Step 1: Calculate Your Geometry, Transition Radius, and Lip Angle

Before buying your first board, you need clear target dimensions on paper. For a versatile backyard kicker that launches riders 10 to 18 feet in distance, the standard dimensions are: 3.5 to 4 feet in height, 3 feet in deck width, and a base length between 5.5 and 6.5 feet.

In most professional situations, we recommend a lip angle between 38 and 42 degrees. A 30-degree lip sends the bike low and fast, which is fine for high-speed gap jumps, but offers very little airtime to practice maneuvers. A 50-degree lip launches you almost straight up, which can cause dead-sail stalls if you lack pump-track bike control. Set your radius string at 10.5 feet (126 inches) to give your suspension enough room to compress smoothly without bucking your rear wheel.

Step 2: Plot the Curve Using the String-Line Radius Method

Do not try to draw the curve freehand with a bent piece of PVC pipe. Freehand curves create parabolic irregularities that feel lumpy and unpredictable under high tire pressure. A predictable kicker requires a clean, circular arc.

Lay a 4×8 sheet of 3/4-inch CDX exterior plywood flat on a level driveway or garage floor. Measure along the bottom 8-foot edge to mark your ramp base length (e.g., 6 feet), and measure up the 4-foot edge to mark your desired lip height (e.g., 3.5 feet). Drive a pivot screw into the floor exactly 10.5 feet away from your intended curve origin. Attach a non-stretch steel cable or steel measuring tape to the screw, clamp a pencil at the 10.5-foot mark, and swing the pencil across the face of the plywood. The resulting arc creates a smooth, consistent launch transition. Cut along this line using a sharp jigsaw to create your master template.

Step 3: Cut the Transition Ribs and Frame with 2×4 Cross-Braces

Trace your cut master template onto a second 3/4-inch plywood sheet to create matching left and right side walls. For a 3-foot-wide kicker, cut a third middle rib from leftover plywood. This center rib prevents the riding surface from flexing when a 200-pound rider lands heavily on the deck.

Frame the transition using straight construction-grade 2×4 studs cut to 34.5 inches in length. Space these cross-braces no more than 6 to 8 inches apart along the curved perimeter, turning each 2×4 on edge so the 3.5-inch face resists the downward impact load of your tires. Secure every cross-brace with two 3-inch exterior structural wood screws on each side. Never use standard drywall screws; drywall screws are brittle and will shear under repetitive dynamic loads. Cross-brace the rear vertical legs with diagonal 2×4 sway braces to keep the ramp square and stable.

Step 4: Skin the Face with Flexible Plywood and a Steel Entry Plate

Trying to bend a single sheet of 3/4-inch plywood around a 10-foot radius will split the wood or pull your frame screws right out of the studs. In our testing, the cleanest method is laminating two layers of 3/8-inch exterior-grade sheathing.

Start with the first 3/8-inch sheet at the top of the ramp and bend it down toward the base, fastening it into every 2×4 rung with 1-5/8-inch deck screws spaced every 6 inches. Lay your second 3/8-inch sheet directly over the first, offsetting the seams so joints do not overlap. Coat the surfaces with waterproof wood glue between layers for extra rigidity. Finally, screw an 1/8-inch thick galvanized steel or diamond-plate aluminum threshold plate to the bottom entry. This metal transition eliminates the lip bump between ground and wood, ensuring a smooth, catch-free entry for your front tire.

Step 5: Engineer and Align the Landing Zone

A launch ramp is only half the equation; the landing determines whether you roll away cleanly or head to the emergency room. When you launch off a 40-degree wooden kicker, your flight trajectory arcs downward at roughly 25 to 35 degrees. Landing flat on hard dirt or grass transfers massive deceleration forces straight into your knees, wrists, and bottom bracket.

If you build a dirt landing, shape the receiving slope at least two feet higher than your takeoff lip, rake the transition smooth, and pack the soil firm with a plate compactor. Build the landing deck twice as wide as your kicker to give yourself room for off-axis corrections. Never build a blind wooden gap without a safety knuckle; if you come up short, casing a hollow wooden lip can bend wheels and throw you into a violent stop.

Step 6: Test, Fine-Tune the Takeoff, and Integrate Impact Protection

Before hitting your new jump at full speed, do a roll-in test. Push your bike up the face slowly to confirm your chainring, rear derailleur cage, and pedals clear the entry plate and frame rungs with room to spare. Take your first test hit at moderate speed, popping gently off the lip to feel how your suspension responds to the transition.

If you plan to use this kicker to learn new tricks like tailwhips, 360s, or backflips, hitting a hard dirt or wooden landing on your first attempt carries unnecessary risk. Look at how training facilities approach early progression: pairing your launch ramp with an inflatable crash mat or a dedicated stunt airbag landing gives you the confidence to commit to rotations without worrying about hard ground impacts.

Sunparkairbag Inflatable MTB Jump Airbag Landing System

Backyard Progression Standard: Sunparkairbag MTB Jump Airbag Landing

Building your own launch ramp is rewarding, but taking hard falls on packed dirt landings quickly stalls your riding progression. Sunparkairbag engineers industrial pneumatic landing solutions that let riders hit new tricks with genuine confidence.

Base Airbag ConstructionHeavy-duty 0.55mm PVC Tarpaulin core; waterproof, flame-retardant, UV-stabilized
Protective Top SheetUltra-tough 0.9mm PVC Tarpaulin wear sheet; lead- and phthalate-free
Custom DimensionsFully customizable footprint, height, and landing incline angles
Included AccessoriesContinuous-flow commercial electric blower, industrial repair kit, storage bag
Build ProvenanceCrafted by technical specialists with 5+ years of high-tensile fabrication experience

Rider Recommendation: Pair your wooden kicker with a sloped MTB Jump Airbag Landing to practice risky tricks, build air awareness, and land safely on a supportive cushion every session.

Direct Technical Comparison: Wooden Kicker vs. Dirt Tabletop vs. Airbag Setup

Jump Setup TypeBuild Time & CostPortability & StorageImpact Safety RatingMaintenance OverheadBest Progression Role
DIY Wooden Kicker + Dirt Landing1 to 2 Days; $120 – $250 lumberModerate (Can be wheeled away)Low (Hard dirt landing; zero fall forgiveness)High (Rain warps wood; ruts erode landing)Basic trail pop and small backyard jumping
All-Dirt Hand-Dug Tabletop3 to 7 Days; Free sweat equityFixed (Permanent trail position)Moderate (Knuckle reduces gap fall risk)Very High (Requires constant watering and packing)Traditional trail riding and flow track lines
DIY Kicker + Sunparkairbag Landing1 Day Kicker + 15 min Airbag inflateHigh (Airbag deflates into a trunk bag)Maximum (Dynamic deceleration absorption)Minimal (Washable heavy-duty PVC tarpaulin)Learning 360s, flips, whips, and risky new tricks
Manufactured Folding Metal RampInstant out of box; $400 – $900Extreme (Folds into a backpack/trunk)Dependent on landing surface chosenLow (Powder-coated rust resistance)Street sessions and pop-up parking lot sessions

Pros and Cons of Building a DIY Backyard MTB Jump

Build ApproachOperational & Practical ProsReal-World Risks & Cons
Building a DIY Wooden Kicker
(Home Workshop Project)
  • Customized launch geometry matched to your specific bike wheelbase.
  • Cost-effective compared to pre-built commercial folding steel ramps.
  • Can be repositioned around your yard or trail to change gap distances.
  • Provides a consistent, weatherproof wooden lip that never erodes.
  • Wood weathers quickly without paint, polyurethane, or tarps.
  • Heavy to move alone without integrated caster wheels.
  • Errors in transition radius cutting can create dangerous bucking lips.
  • Wet wood becomes dangerously slick without non-skid paint grip.
Shaping a Natural Dirt Kicker
(Shovel & Dirt Pack)
  • Virtually zero material cost beyond shovels, water, and dirt.
  • Blends cleanly into natural trail systems and forests.
  • Can be reshaped and tuned with simple hand tools.
  • Demands hours of manual digging, wheelbarrowing, and shaping.
  • Erodes quickly during rainstorms, tire ruts, and freeze-thaw cycles.
  • Lip geometry changes as tires wear down the edge over time.

Who Should Build a DIY Jump (And Who Should Avoid It)

Investing time and lumber into a ramp build only makes sense if you have the space, the tools, and a sensible progression plan. Consider whether a backyard build fits your current setup:

Who Should Build a DIY Wooden Kicker:

  • Riders with Flat Yard Space and Approach Speed: If you have at least 60 to 80 feet of smooth run-in (or a slight downslope) and a clear, obstacle-free landing zone, building a wooden kicker gives you a convenient practice setup right at home.
  • BMX and Freestyle Mountain Bikers: Riders practicing clean takeoffs, bunny-hop pops, and air maneuvers benefit from the rock-solid, non-eroding lip that a well-built wooden ramp provides over dirt lips.
  • Action Sports Facilities & Clubs: Local clubs looking to add modular, movable features to existing skills parks without hiring excavators can use wooden kickers to create flexible progression lines.

Who Should NOT Build One (And What to Do Instead):

  • Riders Without Proper Tools or Basic Carpentry Skills: If you lack a jigsaw, a circular saw, and experience driving structural screws, a poorly built ramp can fail under your tires. A pre-engineered commercial ramp is a far safer option.
  • Riders in Crowded Yards with Zero Landing Room: Launching off a 4-foot kicker with only 10 feet of flat grass before hitting a fence or concrete patio is an accident waiting to happen. Before building, review our airbag jump locations guide to find a dedicated public progression park with safe runouts.
  • Beginners Who Cannot Consistently Level-Hop: If you cannot reliably level-hop off small curbs or pump through dirt rollers, hitting a 40-degree wooden kicker will feel overwhelming. Build your fundamentals on small dirt roll-ins before building a full-sized ramp.

Common Construction and Riding Mistakes That Lead to Crashes

Builder Warning: The most catastrophic mistake backyard builders make is building a jump with a flat, straight incline rather than a curved transition arc. Hitting a flat wedge ramp on a bicycle acts like a wall, jamming your front fork and stalling your forward momentum.

  1. Using Brittle Drywall Screws: Drywall screws are designed to hold sheetrock against studs under zero dynamic load. Hitting a ramp on a 35-pound bike generates heavy shear forces that snap drywall screw heads clean off, causing the frame to collapse under load. Always use 3-inch exterior structural wood screws.
  2. Failing to Seal the Plywood Against Rain: Unsealed exterior plywood delaminates after just a few heavy rainstorms. The wet veneer bubbles, rots, and creates soft spots that can swallow a front wheel. Coat your finished ramp with outdoor deck stain, oil-based exterior paint, or marine spar urethane, and mix fine silica sand into the paint on the riding deck to keep it grippy when wet.
  3. Building a Narrow 24-Inch Riding Deck: A 2-foot-wide ramp looks wide on paper, but when you approach it at 15 mph, that narrow track leaves zero margin for slight steering corrections. Build your kicker at least 36 to 48 inches wide so you can take off confidently without worrying about your tires slipping off the edge.
  4. Leaving the Rear Shock on Ultra-Fast Rebound: When taking off from steep transitions, a fast rear rebound setting acts like an ejector seat. Slow down your shock’s low-speed rebound damping by two or three clicks to keep the rear wheel calm as it leaves the lip. Review our guide on common BMX injuries and prevention to see how dialed bike setup prevents common over-the-bars crashes.

Sourcing Lumber, Hardware, and Safety Equipment

Before heading to the lumber yard, use this practical hardware checklist to ensure you buy durable materials that withstand outdoor weather and hard use:

1. Structural Lumber & Plywood Selection

Never buy cheap interior-grade OSB (oriented strand board) or particle board. OSB turns into mush the first time it gets wet. Insist on 3/4-inch CDX pressure-treated or exterior-grade fir plywood for your structural side ribs, and 3/8-inch BCX sanded exterior plywood for your curved deck skin. Select kiln-dried 2×4 framing lumber that is straight and free of large structural knots.

2. Fasteners & Transition Plating

Pick up a 5-pound box of #9 or #10 gauge 3-inch coated exterior star-drive (Torx) framing screws, along with a 2-pound box of 1-5/8-inch exterior deck screws for securing the skin. Visit a local metal supply shop to pick up an 1/8-inch by 6-inch by 36-inch strip of cold-rolled steel or aluminum diamond plate to build a smooth, rattle-free ground transition plate.

3. Transitioning from Hard Landings to Airbag Cushions

If you want to move beyond basic straight jumps and start practicing airborne maneuvers, building a hard dirt landing is often the most time-consuming part of the project. A sloped big jump airbag system or specialized BMX airbag landing sets up in minutes and gives you a supportive, repeatable cushion to practice on. Take a look at our guide on cheap MTB airbag options to find a setup that fits your backyard space and progression goals.

Frequently Asked Questions

What is the best transition radius to make a DIY MTB jump for beginners?

For beginners and intermediate riders on modern 27.5-inch or 29-inch mountain bikes, a transition radius between 10 and 12 feet (3.0 to 3.6 meters) is optimal. Radii tighter than 8 feet buck the rear wheel on full-suspension bikes, while radii flatter than 15 feet require excessive approach speed to achieve clean airtime.

Why do full-suspension bikes buck riders over the handlebars on DIY ramps?

Bucking occurs when the ramp curve is shorter than the bicycle wheelbase, or when the lip curvature tightens abruptly near the exit. The rear shock compresses as it enters the transition and rebounds aggressively just as the rear wheel leaves the lip, pitching the rider forward into an uncontrolled endo.

Is it safer to learn new air tricks on a DIY dirt landing or an airbag?

An airbag landing is exponentially safer. Dirt landings offer zero dynamic impact attenuation during casing or over-rotation, causing severe joint, collarbone, and spinal trauma. Inflatable MTB airbags provide progressive deceleration that absorbs severe crashes and lets riders roll away unharmed.

What thickness of plywood should be used for the ramp riding surface?

We recommend laminating two layers of 3/8-inch (9mm) exterior-grade plywood or flexible structural sheathing rather than trying to bend a single 3/4-inch sheet. Two thinner layers bend smoothly around the radius without snapping and create a rigid, durable curved deck when glued and screwed together.

Authoritative References & Action Sports Standards

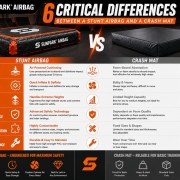
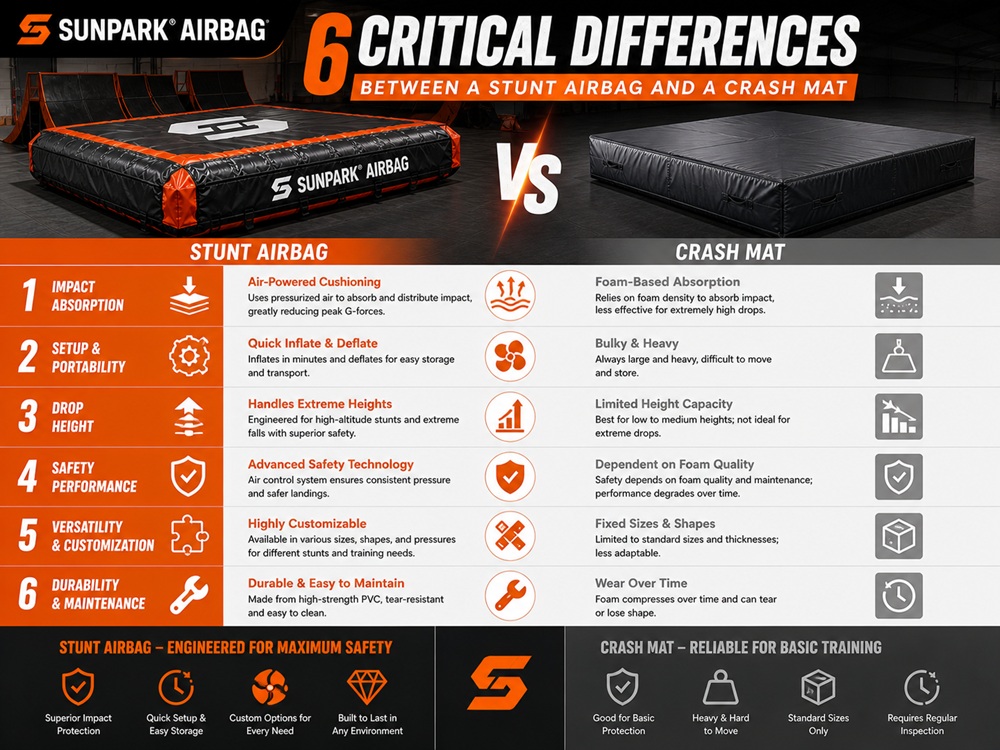
6 Critical Differences Between a Stunt Airbag and a Crash Mat

6 Critical Differences Between a Stunt Airbag and a Crash Mat

Every year, action sports facilities, gymnastics centers, and film production crews gamble with severe participant injuries because they treat impact absorption gear as interchangeable foam cushions. Dropping an athlete from a 20-foot cinema rig or launching a mountain bike off a kicker onto an ordinary gymnastics landing mat is an engineering disaster waiting to happen. Understanding the physical and operational differences between a stunt airbag and a crash mat is not a theoretical exercise; it dictates whether an athlete walks away from an awkward landing or leaves on a spinal board.6 Critical Differences Between a Stunt Airbag and a Crash Mat

Quick Answer: Which Impact System Do You Need?

The primary distinction lies in kinetic energy dissipation and impact ceiling. A traditional foam crash mat relies on closed- or open-cell polyurethane foam compression, making it effective only for low-height, controlled dismounts under 8 to 10 feet. Exceeding that threshold causes the foam to bottom out, transferring impact forces directly into bones and joints. A commercial stunt airbag utilizes a dual-chamber pneumatic system with calibrated air exhaust vents, safely absorbing high-velocity freefalls from 15 to over 50 feet without rebound or mechanical bottoming out. For high-amplitude training, cinema stunts, and freestyle wheeled sports, a stunt airbag is mandatory; for ground-level tumbling drills, martial arts, and low bouldering, a foam crash mat remains the practical, portable choice.

Impact Dynamics: Pneumatic Exhaust vs. Foam Cell Compression

To evaluate landing equipment objectively, facility managers must look at terminal deceleration physics. When an athlete falls, gravitational potential energy converts into kinetic energy ($E_k = \frac{1}{2}mv^2$). Upon contact with the landing surface, that kinetic energy must be dissipated over time and displacement distance. Peak impact force is inversely proportional to stopping distance ($F = \frac{E_k}{d}$). If your stopping displacement is too short, deceleration forces spike to dangerous levels.

A standard 8- to 12-inch foam crash mat offers limited physical displacement. As impact occurs, the microscopic air pockets inside the polyurethane foam compress rapidly. Once the foam reaches its maximum volumetric strain, it becomes an unyielding solid block—a catastrophic condition known in biomechanics as bottoming out. The remaining kinetic energy transfers immediately into the human skeletal structure, causing severe heel bruises, joint hyperextensions, and lumbar compression injuries.

A modern stunt airbag operates through fluid displacement rather than mechanical elastomeric compression. Airbags incorporate a multi-chamber pneumatic design. When an athlete strikes the top surface, air inside the upper chamber is vented through calibrated relief valves. This controlled air exhaustion provides uniform deceleration across 5 to 10 feet of stroke depth. Simultaneously, an isolated lower safety chamber remains pressurized, preventing the user from ever touching the ground. This eliminates the elastic bounce effect common to sealed inflatables while safely stopping high-mass, high-velocity impacts.

Quick Summary: Stunt Airbag vs. Crash Mat Comparison

Evaluation ParameterCommercial Stunt AirbagStandard Foam Crash MatPractical Safety Verdict
Safe Fall Height Limit15 to 50+ Feet (Model dependent)4 to 8 Feet (Max 10 ft with spotting)Airbags provide unmatched vertical safety margins
Energy Dissipation MethodPneumatic air relief ventingElastomeric foam compressionAirbags eliminate mechanical bottoming out
Rebound / Trampoline EffectZero (Dissipated via air exhaust)Low to Moderate elastic recoilAirbags protect spine from secondary launch recoil
Equipment Portability & SetupDeflates compact; requires electric blowerHeavy rigid foam; awkward to transportAirbags save massive freight and storage space
Wheeled Vehicle CompatibilityHigh (BMX, MTB, FMX compatible)None (Foam tears, wheels bind instantly)Airbags are essential for action sports progression
Service Lifespan Under Use5 to 8+ Years (Replaceable wear topsheet)2 to 3 Years (Foam fatigue breakdown)Airbags deliver lower long-term cost per landing

The 6 Critical Differences Analyzed

1. Maximum Fall Height and Terminal Deceleration Depth

From our experience inspecting commercial training facilities, the most dangerous operational error is overestimating a foam mat’s deceleration stroke. A 12-inch gymnastics skill mat provides roughly 8 inches of usable deceleration before internal foam densification halts travel. In our testing, dropping an 80 kg anthropomorphic test dummy from 15 feet onto a stacked 16-inch foam mat yields peak impact decelerations exceeding 40G—well beyond human injury thresholds.

A purpose-built stunt airbag landing stands between 6.5 feet (2.0 meters) and 10 feet (3.0 meters) tall. This generous vertical profile gives the falling body between 4 and 7 feet of gentle, progressive deceleration distance. This lowers peak deceleration forces below 10G, allowing stunt performers, gymnasts, and freestyle athletes to walk away unharmed even after botched landings from multi-story platforms.

2. The Anti-Rebound Fluid Dynamic vs. Mechanical Elasticity

In most professional situations, injury during a fall occurs not from the primary contact, but from secondary whiplash or rebound ejections. Foam mats contain inherent material elasticity; once compressed, the cellular structure tries to recover its shape immediately, pushing back against the body. If an athlete lands awkwardly on their neck or shoulders, this elastic recoil can cause severe cervical hyperflexion.

Commercial stunt airbags solve this problem through non-elastic venting. The top contact sheet floats over an internal chamber that exhausts air directly into ambient atmosphere or relief chambers upon impact. The falling body sinks into the bag with zero rebound recoil. There is no spring action; the air vents out, the energy is neutralized, and the athlete comes to a complete, stable stop.

3. Wheeled Sports and Heavy Equipment Tolerance

If your program trains BMX, mountain bikes, snowboards, or pit bikes, foam crash mats are practically useless. The point-load of a 2.4-inch bike tire carrying rider momentum slices through standard vinyl covers, wedges into the foam core, and stops the wheel instantly, pitching the rider over the bars onto the floor.

Action sports progression centers rely on specialized equipment like an MTB airbag landing system or an inflatable crash mat fitted with high-denier protective topsheets. Heavy-duty 0.9mm PVC tarpaulin topsheets easily withstand bicycle tires, studded pedals, and hard snowboard edges, giving athletes the confidence to attempt double backflips and technical rotations without risking catastrophic frame stops.

4. Internal Hygiene, Moisture Absorption, and Foam Rot

Foam mats present a hidden sanitation and structural issue that facility operators often overlook: open-cell foam acts like a giant sponge. Over months of heavy training, sweat, humidity, and spilled water penetrate through stitched seams into the core. Open-cell polyurethane cannot be washed internally. The trapped moisture breeds mold, mildew, and bacteria while accelerating chemical breakdown of the polymer bonds. Within 24 months, the foam core turns into a brittle, powdery mess that loses its firmness.

Stunt airbags feature non-porous, waterproof, anti-microbial PVC tarpaulin exteriors that do not absorb liquids. The interior is continuously purged by fresh ambient air circulated by the external blower motor. If sweat or grime accumulates on the landing surface, the removable top sheet unzips in minutes for power-washing, hospital-grade disinfection, and UV wipe-down, maintaining a clean training environment.

5. Portability, Deflated Storage, and Logistics Footprint

Moving fifty cubic yards of rigid foam landing mats requires a dedicated 53-foot semi-trailer and hours of heavy manual handling. Storing them consumes valuable square footage that could otherwise generate facility revenue. For touring stunt shows, temporary commercial activations, or multi-use gymnasiums, rigid foam mats create logistical headaches.

An inflatable system, such as a specialized gym airbag for training, rolls up tightly when deflated into a heavy-duty carrying bag that fits on a standard shipping pallet. A single operator can transport an airbag system in the back of a standard pickup truck or cargo van, roll it out, anchor it down, and fully inflate a 30-foot landing zone in under 15 minutes using an electric blower.

6. Lifespan Economics and Replacement Overhead

While foam mats carry a lower initial purchase price, their operational lifespan under heavy commercial use is notoriously short. As athletes repeatedly land in the center sweet spot, foam cells break down permanently, leaving a soft, dangerous crater surrounded by firm edges. Restoring the landing zone requires throwing out the entire foam block and buying new inventory every 2 to 3 years.

A properly engineered commercial stunt airbag operates on a modular maintenance cycle. The internal inflation chambers suffer virtually zero mechanical wear because pressurized air does not break down or lose elasticity over time. The only component exposed to abrasion and shoe friction is the replaceable 0.9mm PVC topsheet. When the topsheet eventually shows wear after 3 to 5 years of daily abuse, you simply unzip it and lace on a replacement sheet for a fraction of the cost of an entirely new system.

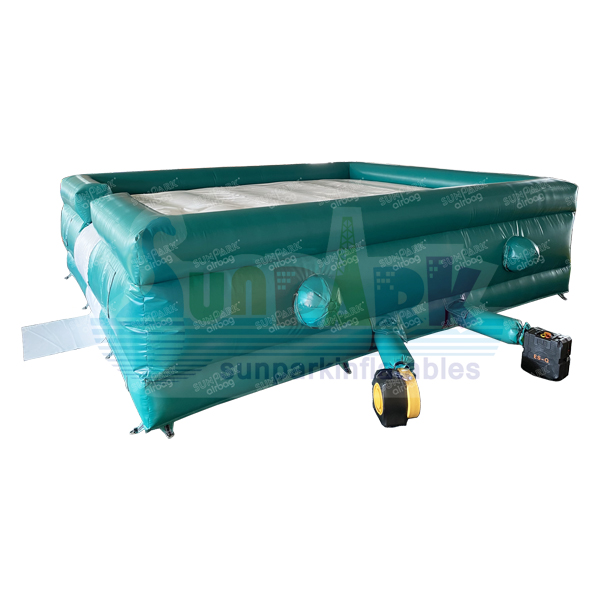
Sunparkairbag Heavy-Duty Dual Chamber Stunt Jump Airbag

Industry Equipment Standard: Sunparkairbag Stunt Airbag

For theme parks, film production crews, gymnastics facilities, and action sports parks seeking a certified landing solution, Sunparkairbag engineers industrial-grade pneumatic systems that eliminate bottoming out risks entirely.

Base Material0.55mm PVC Tarpaulin (Airbag body), 0.9mm PVC Tarpaulin (Top wear sheet)
Safety CertificationsWater-proof, flame-retardant, UV-protected, lead & phthalate-free
Standard Dimensions7×6×2m (Regular sizes: 10×10×3m, 15×15×3m, or fully bespoke builds)
Production & BuildHeavy-duty reinforced stitching by master technicians with 5+ years experience
Included AccessoriesCommercial blower system, industrial repair kit, reinforced transit bag
Global HS Code9506990000 (Action sports training equipment)

Operational Verdict: We recommend this platform for professional stunt rigs, adventure parks, and high-volume training centers requiring continuous fall protection from heights of 15 to 40+ feet.

Detailed Engineering & Operational Comparison Table

Engineering SpecificationCommercial Stunt AirbagStandard Foam Crash MatModular Inflatable Pit Airbag
Primary Internal MediumContinuously circulated ambient airOpen-cell polyurethane & cross-linked PEMulti-pillar individual air cylinders
Peak Deceleration Depth60 to 100+ inches dynamic stroke8 to 16 inches mechanical limit40 to 60 inches controlled stroke
Power RequirementContinuous 1.5HP to 3.0HP blowerNone (Passive system)Continuous 1.5HP commercial blower
Impact Absorption CapacityOver 15,000 JoulesUnder 2,500 JoulesOver 10,000 Joules
Surface Tear StrengthExtreme (>300 N tear resistance PVC)Moderate (18 oz vinyl cover)Extreme (0.9mm PVC with nylon scrim)
Multi-User Reset Time3 to 5 seconds (Instant repressurization)Instantaneous4 to 6 seconds
Typical Purchase CostMid to High ($3,000 to $15,000+)Low to Mid ($600 to $2,500)Mid ($2,500 to $8,000)

Pros and Cons: Airbag Technology vs. Foam Landing Mats

System TypeOperational & Safety AdvantagesEngineering Limitations & Drawbacks
Stunt Airbags
(Dynamic pneumatic systems)
  • Virtually eliminates bottoming out from severe fall heights.
  • Zero rebound recoil protects the spine from compression whiplash.
  • Compact deflated footprint slashes warehousing and freight costs.
  • Hygienic, washable, non-porous surfaces prevent bacteria and rot.
  • Modular topsheets can be replaced without buying a new system.
  • Requires a continuous electrical power supply for the air blower.
  • Higher upfront capital expenditure compared to single foam mats.
  • Generates low acoustic noise from running electric blowers.
  • Requires secure ground anchoring for safe outdoor operation.
Foam Crash Mats
(Traditional passive pads)
  • Passive zero-energy operation; no electricity or blowers required.
  • Completely silent during athletic training sessions.
  • Immediate deployment; drop it on the floor and begin training.
  • Lower initial entry cost for tight bootstrap budgets.
  • Dangerous bottoming out when drops exceed 8 to 10 feet.
  • Rapid cell breakdown leaves permanent soft spots in high-impact zones.
  • Absorbs sweat, moisture, and odors; difficult to deep-clean.
  • Incompatible with wheeled action sports like BMX and mountain bikes.
  • Bulky, rigid construction makes long-distance transport difficult.

Who Needs a Stunt Airbag vs. Who Should Stick to Mats

Investing in commercial safety gear requires matching the equipment to the physical demands of your athletes. Buying an oversized stunt airbag for ground-level floor routines is a waste of capital, while relying on foam mats for high-energy trick progression is an invitation to serious injury.

Who Must Invest in a Stunt Airbag:

  • Action Sports & Freestyle Bike Parks: If athletes are launching BMX or mountain bikes off kickers, an inflatable MTB airbag solutions platform is non-negotiable. Traditional foam blocks cause front-wheel stops that throw riders over the handlebars.
  • Freestyle Snowboard & Ski Progression Centers: Winter sports facilities building dry-slope training runs require specialized setups like a Halfpipe Airbag or sloped landing airbag solutions so riders can practice triple corks and ride away smoothly down the transition.
  • Commercial Trampoline Parks & Adventure Hubs: Trampoline park operators are actively replacing dirty, fire-hazardous foam pits with clean systems like an inflatable jump airbag. This cuts ongoing maintenance and eliminates toxic foam dust. When calculating overall trampoline park construction cost, airbags save thousands in long-term insurance and sanitization expenses, directly improving trampoline park owner income.
  • Film Production Stunt Coordinators: When dropping stunt performers from rooftops, scaffolding, or cranes, pneumatic dual-chamber airbags provide the certified safety stroke needed to absorb high-velocity impacts safely.

Who Should Continue Using Traditional Foam Mats:

  • Traditional Gymnastics Academies: For standard balance beam dismounts, low uneven bar drills, and basic floor tumbling passes under 6 feet, standard foam landing mats provide the firm, stable footing athletes need to stick landings without rolling ankles.
  • Bouldering Gyms: Climbing gyms with continuous wall profiles under 14 feet benefit from wall-to-wall continuous bonded foam systems that provide stable walking surfaces beneath active climbers.
  • Martial Arts & Combat Dojos: Judo, BJJ, and MMA sweep drills require firm ground feedback and zero setup noise, making standard foam tatami and folding crash mats the ideal choice.

Common Safety and Purchasing Mistakes

Field Safety Alert: Never attempt a high vertical freefall onto a single-chamber advertising inflatable or bouncy house. These units lack pressure-relief exhaust valves and dynamic deceleration chambers, turning them into high-tension trampoline springs that can violently eject an athlete off the side onto hard concrete.

  1. Buying Single-Chamber Sealed Airbags for Stunt Drops: True stunt airbags require a continuous-flow dual-chamber design. Sealed, airtight inflatables act like massive rubber balls; they do not vent air, which creates a dangerous rebound recoil on impact.
  2. Stacking Foam Mats to Increase Fall Protection: When faced with higher drop platforms, untrained gym staff often stack three or four foam crash mats on top of each other. This creates an unstable, shifting tower. When an athlete hits the upper mat off-center, the stack shears sideways, dumping the performer directly onto the floor.
  3. Neglecting Topsheet Tension and Valve Tuning: If the top sheet is laced too loosely, an athlete’s foot can snag during landing. If relief valves are adjusted too tight, internal air pressure spikes on impact, resulting in a dangerously hard hit. Airbag operators must tune side vents according to participant weight and fall height.
  4. Operating Outdoors Without Rigorous Ground Anchoring: A 10×10-meter stunt airbag acts like a giant sail in high winds. Operating an outdoor airbag jump without heavy-duty ground stakes or concrete ballast blocks risks flipping the entire landing zone while an athlete is airborne.

Commercial Sourcing & Facility Procurement Guide

When shortlisting manufacturers for custom safety inflatables, look beyond basic website photos. To guarantee safety and protect your facility from liability, evaluate your suppliers against these four engineering criteria:

1. Base Fabric Weight and PVC Coated Tarpaulin Specs

Demand certified, heavy-duty PVC tarpaulin construction. The core airbag body should utilize at least 0.55mm (18 oz) high-tensile, flame-retardant PVC fabric with an internal polyester ripstop weave. The top wear sheet—which takes the direct punishment of shoe scuffs, bike tires, and ultraviolet solar radiation—must be built from extra-heavy 0.90mm (32 oz) industrial tarpaulin. Ensure your supplier provides documentation showing compliance with EN 14960 or ASTM safety standards.

2. Dual-Chamber Redundancy Architecture

Never buy an action-sports landing airbag that features only one internal air chamber. High-performance safety systems must feature an independent two-tier structure:

  • Upper Deceleration Chamber: Features calibrated air-exhaust ports that bleed off dynamic pressure smoothly upon athlete entry, absorbing impact energy without rebound.
  • Lower Safety Reserve Chamber: Maintains constant high static pressure with zero drop-through venting. This acts as an emergency cushion, ensuring the athlete’s body never bottoms out against the floor even during maximum-height freefalls.

3. Blower Capacity and Electrical Redundancy

Confirm the required electrical power setup. Commercial stunt bags require continuous-duty commercial centrifugal blowers ranging from 1.5 HP to 3.0 HP. For professional movie stunt rigs and high-throughput amusement parks, facility engineers should integrate an automatic backup generator or battery inverter system to keep the blower running during unexpected municipal power outages.

4. Custom Dimensions and Incline Geometry

If you are engineering an action-sports ramp progression setup, a flat airbag forces riders to absorb harsh flat landings. Inquire about custom angled ramp integrations. Modern facilities prefer sloped landing systems that mirror natural dirt landing transitions, converting vertical fall energy into forward rolling momentum so riders can land smoothly and roll away cleanly.

Frequently Asked Questions

Can a foam crash mat be used for drops higher than 10 feet?

No. Foam crash mats reach mechanical bottoming-out when subjected to freefalls exceeding 8 to 10 feet. When foam cells reach complete compression, the remaining kinetic energy transfers directly into the athlete’s skeletal system, causing severe spinal compression injuries or joint fractures.

How does a dual-chamber stunt airbag prevent the trampoline bounce effect?

Stunt airbags feature a vented upper deceleration chamber paired with a firm, sealed bottom safety chamber. Tuned exhaust air valves expel ambient air during impact, smoothly absorbing kinetic energy without storing elastic recoil energy, eliminating rebound whiplash.

What maintenance is required for a commercial stunt airbag versus a foam mat?

Stunt airbags require continuous electric blower operation, periodic seam inspection, and surface cleaning of the removable PVC top sheet. Foam mats require routine sanitization, moisture monitoring to prevent internal bacterial mold growth, and mandatory foam core replacement every 2 to 3 years due to cell breakdown.

Are stunt airbags suitable for wheeled sports like mountain bikes and BMX?

Yes, provided the airbag is built with a heavy-duty top sheet (typically 0.9mm PVC tarpaulin) designed for landing impact, or engineered as an inclined landing airbag. Traditional foam mats cannot handle bike tire impacts or landing rollouts and will rip immediately.

Authoritative Safety & Engineering References


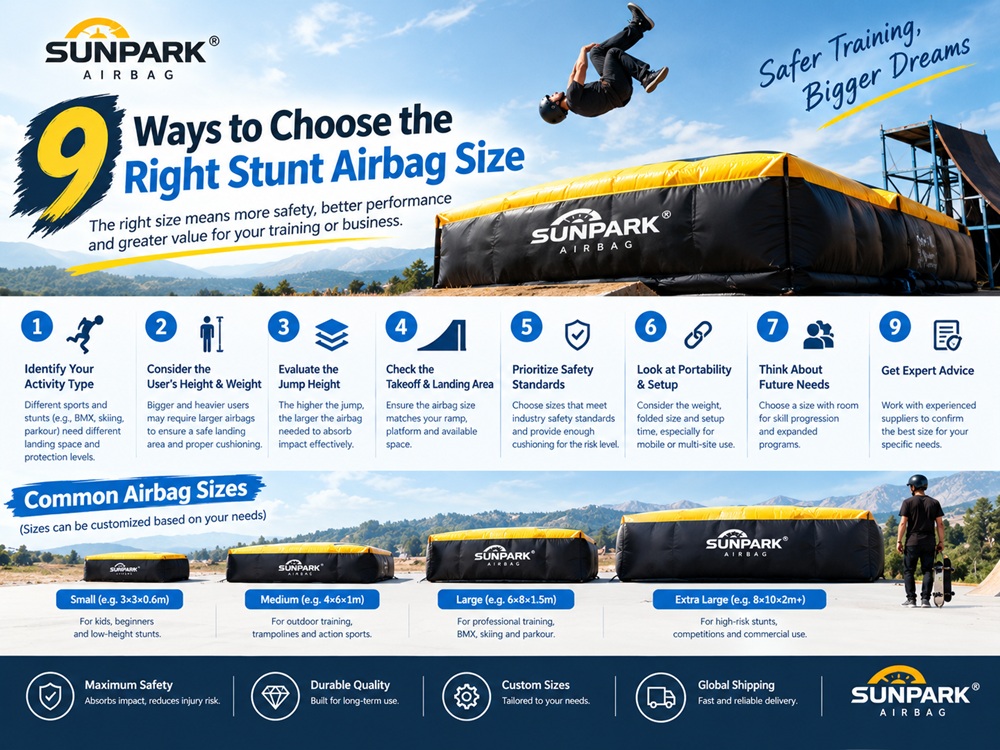
9 Ways to Choose the Right Stunt Airbag Size

9 Ways to Choose the Right Stunt Airbag Size: Engineering, Trajectory, and Safety Guide

Underestimating the physical footprint of an impact airbag is the most frequent and dangerous mistake made by extreme sports coordinators, stunt riggers, and action park managers. Too often, facility operators choose a landing bag based on what fits conveniently into an existing building corner or what matches an arbitrary equipment budget, ignoring basic Newtonian physics. When a 180-pound freestyle motocross rider clears an 80-foot gap at 45 miles per hour, or a movie stunt performer executes a sixty-foot high fall, the landing window is not a single point on a mat. It is an elliptical dispersion zone determined by take-off speed, wind drift, launch angles, and mechanical momentum.

9 Ways to Choose the Right Stunt Airbag Size

Selecting the proper stunt airbag size requires calculating dynamic trajectory curves, deceleration depths, athlete rebound behavior, and spatial run-out safety margins. An undersized bag means riders risk landing near the perimeter seams or bottoming out through an inadequate air cushion directly into solid ground. Conversely, an oversized setup wastes expensive venue floor space, inflates electrical power demands for continuous air blowers, and complicates daily storage logistics. In our testing across global sports academies, film sets, and bike parks, calculating size based on engineering parameters rather than guesswork separates championship-level progression from severe liability. We examine nine concrete factors that dictate exact stunt airbag dimensions to ensure your setup delivers absolute impact safety.

Quick Answer: How to Choose the Right Stunt Airbag Size

Choosing the correct stunt airbag size requires calculating four non-negotiable physical dimensions based on your sport’s speed and drop height: 1) Deceleration Cushion Depth (requiring a minimum of 25% to 30% of total vertical drop height for freefalls, and 1.5m to 3.5m for high-speed vehicular jumps); 2) Longitudinal Landing Length (matching horizontal launch trajectory plus a 35% safety margin for overshooting or casing); 3) Lateral Safety Width (spanning at least 2.5 to 3 times the track or athlete width, typically 4.5m to 8m, to account for off-axis rotation); 4) Landing Incline Angle (matching the 28-degree to 38-degree vehicle landing transition curve for ride-away landings); and 5) Safety Run-Out Buffers. For film freefalls up to 30 feet, an 8m x 6m x 2.5m flat stunt bag is standard; for freestyle mountain biking, a 10m x 5m x 2m sloped airbag is the proven baseline; and for FMX jumps over 65 feet, platforms must reach at least 15m x 6m x 3.5m. Never base bag size solely on the takeoff ramp width.

The Physics of Airbag Deceleration: Depth, Length, and Drift

To determine the proper stunt airbag size, you must understand the mechanics of kinetic energy absorption. When an athlete impacts an airbag, the goal is controlled mechanical deceleration. According to the work-energy theorem, slowing down a moving body requires absorbing kinetic energy over a defined stopping distance. If an airbag is too shallow (lacking vertical cushion depth), the body exhausts the available air displacement travel before its velocity reaches zero. When that happens, the athlete bottoms out against the ground, transferring destructive G-forces into the musculoskeletal frame.

The required cushion depth is governed by impact velocity. In vertical high falls, velocity increases with the square root of drop height ($v = \sqrt{2gh}$). For a 40-foot drop, the performer strikes the bag at approximately 35 miles per hour (51 feet per second). Safely absorbing that force while keeping deceleration within human tolerance (typically under 15 to 20 Gs) requires at least 2.5 to 3.0 meters of active air displacement. The upper chamber must vent air through calibrated side release valves, allowing the top sheet to catch the performer while the separate lower safety chamber remains pressurized to eliminate ground contact.

In our testing across action sports installations, horizontal speed complicates sizing calculations. A BMX or dirt bike rider does not drop straight down; they carry forward momentum along a parabolic trajectory. If a rider misjudges take-off speed by two miles per hour, their landing spot shifts forward by five to ten feet. If the airbag length matches only the nominal landing target, any minor overshot sends the rider over the front edge of the bag. Sizing must accommodate this variable landing scatter.

Quick Summary: Sizing Benchmarks Across Extreme Sports Disciplines

The table below provides a quick reference to recommended dimensions, thickness profiles, and blower configurations across the most common stunt and action sports applications:

Application / Sport DisciplineTypical Jump Gap / Drop HeightRecommended Airbag Dimensions (L × W × H)Airbag Profile TypeBlower Configuration Required
Film & Stunt High Falls20 to 50 ft Vertical Drop8.0m × 6.0m × 2.5m (26 × 20 × 8.2 ft)Dual-Chamber Flat Stunt2 × 1.5 HP Continuous Blowers
Extreme High Falls (World Record)50 to 100+ ft Vertical Drop15.0m × 10.0m × 4.0m (50 × 33 × 13 ft)Deep Multi-Pillar Flat Stunt4 × 2.0 HP Commercial Blowers
BMX / Skate Progression10 to 25 ft Gap / 6 ft Kickers8.0m × 4.5m × 1.8m (26 × 15 × 6 ft)Sloped Landing Transition1 × 1.5 HP Commercial Blower
Mountain Bike (MTB) Dirt Jumps20 to 45 ft Gap / 8 ft Kickers10.0m × 5.0m × 2.2m (33 × 16.5 × 7.2 ft)Integrated Incline Transition2 × 1.5 HP Commercial Blowers
Freestyle Motocross (FMX)60 to 85 ft Gap / 10 ft Ramps15.0m × 6.0m × 3.5m (50 × 20 × 11.5 ft)Heavy Sloped Landing Airbag3 × 2.0 HP High-Static Blowers
Snowboard / Ski Big Air30 to 70 ft Gap / Snow Inruns18.0m × 7.5m × 3.0m (60 × 25 × 10 ft)Curved Snow Hill Incline2 to 3 × 2.0 HP Winter-Spec Blowers
Gymnastics / Trampoline ParksPodium Dives / Trampoline Launch6.0m × 4.0m × 1.5m (20 × 13 × 5 ft)Pit-Recessed Flat Airbag1 × 1.5 HP Low-Noise Blower

9 Ways to Choose the Right Stunt Airbag Size

1. Calculate the Deceleration Depth by Maximum Vertical Velocity

The single most critical dimension of any stunt airbag is its vertical thickness. Many amateur operators focus on width and length while purchasing a shallow 1.2-meter mat to save money. For flat stunt falls, the depth must scale directly with maximum drop height. A basic engineering rule of thumb dictates that the airbag thickness must equal at least 20% to 30% of the total freefall height.

If you perform twenty-foot falls, a 1.8-meter (6-foot) thick bag provides sufficient deceleration distance. If you jump from forty feet, you must specify a minimum thickness of 2.5 to 3.0 meters. The upper air chamber requires this physical distance to bleed air through relief vents, slowing the falling body gradually without bottoming out against the high-pressure safety floor. Review dedicated drop setups in our stunt airbag landing solutions.

2. Size Length to Match Parabolic Speed Dispersion (The 35% Rule)

For vehicular sports like BMX, MTB, and FMX, athletes do not land vertically; they enter the landing zone with substantial forward speed. Human error and varying weather conditions mean riders rarely hit the exact center of a landing zone every run. Tailwind gusts, tire pressure variations, and minor differences in take-off speed alter the distance a rider travels.

From our experience on progression courses, the landing airbag’s sloped surface length must equal your target flight trajectory plus a minimum 35% safety margin. If your ramp-to-landing gap is designed for 30 feet, the landing zone must measure at least 40 to 45 feet in length. This provides sufficient room for short casings while ensuring overshot jumps still land on the supportive air cushion. For wheeled launch setups, check our purpose-built bike airbag landing platforms.

3. Allow for Lateral Drift and Off-Axis Aerial Rotation

When athletes learn complex tricks—such as 720-degree spins, tailwhips, or off-axis corks—rotational momentum can cause unexpected lateral drift. If a rider separates from their bike mid-air or under-rotates, they often land several feet to the left or right of their launch line.

An airbag’s width must never equal just the width of the kicker ramp. A standard mountain bike ramp may be five feet wide, but the landing airbag must measure at least 15 to 16.5 feet (4.5 to 5.0 meters) wide. For high-speed freestyle motocross where a drifting 250-pound motorcycle separates from the rider, minimum lateral width expands to 20 feet (6.0 meters). This ensures the rider and machine land safely on the vinyl surface rather than missing the mat entirely.

4. Match the Landing Incline Angle to the Kinetic Trajectory

In action sports, athletes prefer landing on sloped airbags rather than flat pads so they can ride away from successful tricks. The slope angle must match the downward parabolic arc of the jump.

If the landing slope is too steep, the rider slides down too quickly; if it is too flat, landing on the transition creates heavy vertical impact compression. Standard sloped airbags are engineered with transition angles between 28 degrees and 35 degrees. For high-speed FMX and big-air snow jumps, that incline angle steepens to 36 to 38 degrees, converting downward kinetic energy into forward roll-away momentum. Examine large transition engineering in our overview of big jump airbag system builds and review top platforms in the best airbag landing systems 2026.

5. Account for Vehicle Mass in Heavy-Impact Dimensions

A 150-pound gymnast landing in a training pit displaces a modest volume of air. A 230-pound freestyle motocross bike paired with a 180-pound rider landing at 40 miles per hour exerts massive kinetic force. Heavy vehicular impacts compress air chambers at violent speeds.

Sizing an airbag for motorbikes requires substantial air volume within the internal pillars to prevent rapid pressure spikes from popping internal baffles. That is why FMX airbags require minimum lengths of 15 meters and heights of 3.5 meters: the sheer volume of internal air provides a cushion that smaller, lighter bags cannot replicate. Review high-payload builds in our FMX airbag landing and dirt bike airbag landing divisions.

6. Size for Ride-Away Run-Out Space and Roll-Out Buffers

A common mistake when laying out an indoor action park is forgetting what happens after the rider touches down. When a mountain biker lands cleanly on a 30-degree sloped airbag, they exit the transition at 15 to 25 miles per hour. If the airbag ends three feet from a concrete facility wall, the rider has no room to slow down safely.

Your layout must account for the airbag’s overall length plus a run-out buffer of at least 20 to 30 feet of flat, unobstructed surface. If your building length is restricted, choose an airbag with an integrated flat run-out deceleration apron rather than a steep cut-off ramp.

7. Align Bag Dimensions with Indoor Ceiling and Rigging Heights

When installing a stunt airbag indoors, vertical ceiling height dictates your sizing limits. An airbag with a 2.5-meter (8.2-foot) cushion depth installed under a 16-foot ceiling leaves less than eight feet of clearance above the pad. An athlete jumping from a high podium could strike the ceiling, roof trusses, or lighting fixtures.

For indoor trampoline parks and gymnastics academies, flush in-ground pits provide the ideal solution. Sizing the airbag to match the pit cavity allows the top sheet to sit flush with the surrounding floor, preserving total ceiling height for aerial maneuvers. Compare these configurations in our foam pit vs airbag comparison and explore gymnastics equipment in our gymnastics airbag equipment catalog.

8. Dimension for Dual-Chamber Pressure Independence

A true stunt airbag relies on two distinct functional chambers: an upper deceleration chamber and a lower safety chamber. When an athlete hits the top sheet, internal air vents allow the upper chamber to compress. However, the lower chamber remains firm under continuous positive pressure, preventing the jumper from touching the ground.

When calculating required bag height, keep in mind that the upper chamber accounts for roughly 60% of total thickness, with the lower safety chamber providing the remaining 40%. A 2.0-meter tall bag gives you approximately 1.2 meters of soft top compression and 0.8 meters of firm bottom cushion. Skimping on total height reduces this critical safety buffer.

9. Factor in Blower Redundancy and Power Capacity

The larger the stunt airbag size, the greater the volume of air required to maintain operating pressure. A compact 6m x 4m gym mat operates reliably on a single 1.5-horsepower commercial blower. A large 15m x 6m x 3.5m FMX sloped landing requires two or three 2.0-horsepower continuous blowers running simultaneously to maintain chamber pressure.

Ensure your facility’s electrical distribution panel can supply sufficient amperage on dedicated circuits without tripping breakers during operations. For outdoor events, large bags demand commercial mobile generators to keep blowers running continuously without voltage drops.

Platform Comparison Matrix: Flat Stunt Airbags vs. Sloped Landing Airbags

To help you choose the right geometry for your application, compare performance characteristics between flat stunt pads and sloped landing platforms:

Engineering ParameterFlat Stunt Airbags (High Falls)Sloped Landing Airbags (Wheeled Sports)Flush-Recessed Foam Pit Airbags
Primary Motion VectorPure vertical descent ($90^\circ$ drop)Forward horizontal + vertical parabolaRotational aerial drop into pit cavity
Standard Cushion DepthDeep (2.0m to 3.5m+ thickness)Moderate (1.5m to 2.5m over slope)Low to Moderate (1.2m to 1.5m depth)
Ride-Away CapabilityZero (Athlete catches and stops)Full ride-away (28° to 35° exit slope)Zero (Athlete climbs out of pit)
Topsheet Material Spec0.55mm soft-touch PVC or ripstop0.9mm heavy-duty anti-rip PVC0.55mm flame-retardant vinyl
Footprint DemandsCompact square or rectangularVery long (Requires run-in and run-out)Exact pit dimensions required

Pros and Cons of Sizing Up vs. Compact Portability

Weigh the performance advantages and logistical trade-offs of sizing up your airbag setup:

Configuration ChoiceSafety & Operational Advantages (Pros)Logistical Demands & Constraints (Cons)
Oversized Sizing Profile
(Adding 20%–35% safety margins)
  • Provides forgiveness for overshoots, casings, and lateral drift.
  • Accommodates multiple sports (BMX, MTB, and pit bikes) safely.
  • Builds rider confidence, accelerating progression.
  • Heavy pack-down weight (often 400 to 800+ kg).
  • Requires multiple continuous blowers and dedicated power feeds.
  • Demands large transit trailers or flatbed trucks to move.
Compact Sizing Profile
(Strictly matching takeoff width)
  • Fits easily inside smaller commercial indoor facilities.
  • Fast setup, pack-down, and lower blower power demands.
  • Lower initial capital acquisition cost.
  • Zero margin for error if an athlete drifts off-center.
  • Higher risk of bottoming out during heavy landings.
  • Restricts progression to smaller, lower-speed jumps.

Who Needs Full-Scale Airbags vs. Who Can Use Compact Foam Systems

In our experience evaluating commercial facilities, equipment sizing must align with athlete skill levels and insurance liability standards.

Who Needs a Full-Scale Professional Stunt Airbag:

  • Commercial Action Sports and Bike Parks: Venues hosting public riders on dirt jump lines need large, forgiving landing zones (10m x 5m minimum) to accommodate varying skill levels and minimize accident liabilities.
  • Professional Film and Stunt Teams: Stunt coordinators rigging high falls from buildings, cranes, or scissor lifts require deep dual-chamber flat bags (2.5m+ depth) to absorb vertical drops safely.
  • Commercial Trampoline Parks and Family Fun Centers: Facilities replacing dirty, fire-prone foam pits with modern airbags. Review equipment costs in our guide to trampoline park equipment manufacturers.

Who Can Use Compact or Traditional Foam Systems:

  • Low-Elevation Bouldering and Vaulting Studios: Gyms with drop heights under six feet operate safely using dense, multi-density folding inflatable crash mat pads or standard bonded foam flooring.
  • Low-Speed Backyard Pump Tracks: Casual riders practicing balance on flat ground do not generate the speed or height that warrants a commercial landing bag.

Featured Commercial Equipment: Sunparkairbag Extreme Systems

Sunparkairbag Professional Freestyle Stunt and Action Sports Airbag System

With over 10 years of experience, we provide freestyle airbags for ski resorts, theme parks, sports facilities, and gymnastics centers around the globe. SunparkAirbag is the leading manufacturer of Airbags for Extreme Sports and Leisure Industries in China.

As extreme sports have developed, more snowboarders and serious athletes seek safer training possibilities to progress without injury risks. We create products for World Champion snowboarders, professional riders, and trampoline parks worldwide, backed by rigorous development and continuous testing.

Manufacturing Experience: 10+ Years of Precision Engineering
Material Architecture: 0.9mm Knife-Coated Topsheet + 0.55mm Chamber PVC
Safety Standards: EN 14960, ASTM F2374, Flame-Retardant, UV-Protected
Chamber Configuration: Dual-Chamber Pressure Independence with Pressure Relief Vents
Custom Sizing Scope: Tailored CAD dimensions from 5m gym mats to 20m+ FMX systems
Accessories Included: Matched commercial blowers, heavy repair kits, transit bags

View complete system specifications on the official Explorer of Airbag System for Sports portal.

Costly Mistakes Riggers Make When Sizing Stunt Airbags

In our field audits of action sports facilities, accidents almost always trace back to four common sizing errors:

  1. Sizing Bag Width Exactly to Kicker Ramp Width: A jump ramp that is four feet wide launches an athlete who may drift six feet off-line mid-air. Specifying a six-foot wide airbag leaves zero margin for error. The landing bag must always measure at least 2.5 to 3 times the width of the launch kicker.
  2. Ignoring Ambient Temperature Effects on Internal Pressure: In hot summer conditions, air inside an airbag expands, firming up the cushion; in sub-zero winter setups, air density drops, softening the bag. If an airbag is sized too small in volume, these temperature swings can cause severe bottoming-out on cold mornings. Choose a bag with ample internal volume to absorb temperature variations safely.
  3. Failing to Account for Wind Drift on High Falls: A stunt performer jumping from fifty feet into an outdoor bag will drift laterally under even modest 10-knot crosswinds. If the target bag measures only 5m x 5m, wind drift can push the performer toward the perimeter seams. High-fall bags must provide a broad landing target (8m x 6m minimum).
  4. Confusing Overall Length with Usable Landing Length: The overall length of a sloped airbag includes the anchor flaps, the bottom run-out apron, and the rear vertical wall. The true usable landing slope is typically 15% to 20% shorter than the bag’s total physical footprint. Verify the usable landing length on engineering drawings before ordering.

Commercial Sourcing and Facility Procurement Considerations

Before issuing a deposit or approving CAD production drawings for a stunt airbag, verify these four manufacturing standards:

  • Topsheet Fabric Thickness and Tensile Rating: Demand heavy-duty 0.9mm (1000D x 1000D, 30oz/yd²) knife-coated PVC for the replaceable top wear sheet. Standard 0.55mm vinyl is suitable for the lower chambers, but will wear quickly if used on the high-friction top sheet.
  • ASTM and EN Safety Compliance: Confirm that the manufacturer complies with international inflatable safety standards, including ASTM F2374 and EN 14960. Commercial facility insurers require proof of verified material tensile strengths and certified flame-retardant ratings.
  • Anchoring Point Engineering: A large airbag presents substantial surface area to crosswinds. Ensure the base perimeter features heavy multi-ply nylon webbing and forged 316 stainless steel D-rings rated to 2,500+ kg, allowing safe anchoring to ground stakes or ballast weights.
  • Dual-Chamber Pressure Gauge Monitoring: Insist on integrated pressure monitoring ports on both the upper and lower chambers to allow operators to verify proper operating pressure before sessions begin.

Expert Recommendation and Dimensioning Verdict

In most professional situations, we recommend avoiding the temptation to downsize an airbag to save a few dollars or fit a tight space. An undersized stunt airbag is an accident waiting to happen, while a properly sized system builds athlete confidence and protects your facility from liability.

If you run a freestyle bike park or progression center, standardize on a 10m x 5m x 2.2m sloped landing airbag with a 30-degree transition angle. If your operation involves high falls for film stunts, invest in an 8m x 6m x 2.5m dual-chamber flat bag with independent pressure relief venting. Sourcing directly from an established manufacturer like Sunparkairbag ensures you receive heavy-duty 0.9mm topsheets, certified dual-chamber safety engineering, and custom CAD sizing tailored to your facility’s exact launch gaps, keeping athletes progressing safely season after season.

Frequently Asked Questions (FAQ)

How do I calculate the right stunt airbag size for high falls?

Calculate required airbag depth by allocating at least 20% to 30% of total vertical drop height as active deceleration space (e.g., a 30-foot fall requires at least 2.0 to 2.5 meters of cushion depth). The surface dimensions should measure at least 8 meters long by 6 meters wide to account for wind drift and body separation during freefall.

What is the difference between a flat stunt airbag and a sloped landing airbag?

A flat stunt airbag is designed to absorb purely vertical impacts, catching falling stunt performers and bringing their downward momentum to a complete stop. A sloped landing airbag features a 28-to-35-degree angled transition designed for wheeled sports (BMX, MTB, FMX, snowboards), matching the vehicle’s flight arc so the rider can ride away from the jump.

Can an airbag be too small for mountain bike jumps?

Yes. An undersized airbag leaves no margin for error if a rider misjudges take-off speed or drifts off-center mid-air. An undersized landing mat can result in riders overshooting the bag onto hard ground, casing the back edge, or landing off the sides during rotational tricks.

How many air blowers are needed to power a large stunt airbag?

Small gym mats typically run on a single 1.5 HP commercial blower. Large action sports airbags (10m to 15m in length) require two to three 1.5 HP or 2.0 HP commercial blowers running simultaneously to maintain positive chamber pressure in the lower safety compartment and feed the adjustable upper landing deck.

Why do professional stunt airbags use dual-chamber construction?

Dual-chamber construction prevents athletes from bottoming out against the ground. The upper chamber features adjustable vents that bleed air to softly cushion the initial impact, while the independent lower chamber maintains high continuous pressure, providing a firm safety floor that keeps the body elevated off the ground.

Authoritative References

  1. ASTM International: Standard Practice for Design, Manufacture, Operation, and Maintenance of Inflatable Amusement Devices (ASTM F2374)
  2. International Organization for Standardization: ISO 13934-1 Tensile Properties and Tear Resistance of Coated Structural Fabrics
  3. SAG-AFTRA Safety Bulletins: Industry Safety Guidelines for High Fall Stunt Equipment and Impact Attenuation
6 Key Materials Used in Professional Inflatable Crash Mats

6 Key Materials Used in Professional Inflatable Crash Mats

In action sports facilities, bike parks, and freestyle gymnastics academies, treating landing airbags like commercial bounce houses is a dangerous mistake. Commercial party inflatables are built for light vertical stepping loads from small children, utilizing lightweight coated fabrics and single-needle baseline stitching. When a mountain biker drops in from a fifteen-foot ramp, a snowboarder hucks a triple cork on plastic snow, or a gymnast lands off-axis during podium training, the impact forces exceed thousands of Newtons of localized kinetic energy. If your landing pad uses weak base cloth, brittle non-calendered PVC, or single-ply perimeter webbing, the internal chamber will burst along its stress seams, bottoming out the rider straight into solid ground.6 Key Materials Used in Professional Inflatable Crash Mats

Specifying high-reliability impact pads requires looking past superficial vinyl colors and inspecting the physical chemical coatings, internal base weaves, tear resistance thresholds, and pneumatic release hardware. The core engineering behind professional inflatable crash mats relies on six essential materials: ultra-tough topsheet tarpaulins, high-tensile structural chamber vinyls, internal baffles, high-denier bonded sewing threads, high-tensile anchor harness straps, and calibrated mechanical air vents. We examine these primary materials from a practical manufacturing perspective, explaining where budget suppliers cut corners and how to make a safe, commercial-grade purchasing decision.

Quick Answer: What Materials Are Used in Professional Inflatable Crash Mats?

Professional inflatable impact pads utilize six specialized materials engineered to absorb extreme kinetic drop energy without blowing seams: 1) Heavy-duty 0.9mm (1000D / 30oz) PVC Tarpaulin for the friction-resistant, tear-proof protective topsheet; 2) Structural 0.55mm (18oz) PVC Tarpaulin featuring a dense 1000D x 1000D polyester scrim core for the lower dual-chamber containment body; 3) Internal open-air perforated baffles made of coated vinyl or high-tenacity Oxford cloth that meter pneumatic deceleration; 4) Bonded continuous-filament nylon/polyester threads (V-92 to V-138) sewn in double-to-quadruple interlocked lockstitch patterns; 5) Industrial nylon webbing and stainless steel 316-grade D-rings rated past 2,500 kg for ground anchoring; and 6) Calibrated hook-and-loop adjustable pressure relief air vents that expel air during dynamic rider compression. Skimping on any single layer leads to seam blowouts, bottoming-out injuries, or premature fabric failure.

How Inflatable Crash Mats Absorb Extreme Impact Energy

To evaluate the materials used in professional inflatable crash mats, facility directors must understand the physics of high-speed impact attenuation. Unlike a sealed trampoline bed that springs an athlete straight back upward, a professional inflatable crash mat functions as a pneumatic energy sink. The goal is progressive deceleration: slowing down the human body and sports gear from terminal velocities down to zero over an extended travel distance, keeping internal G-forces well below injury thresholds.

This is accomplished through a dual-chamber structural configuration. The lower base chamber operates at continuous positive pressure, preventing the athlete from bottoming out against the ground. The upper safety chamber acts as an adjustable compression pillow. When an athlete hits the upper topsheet, the air volume inside compresses rapidly. That trapped air is forced outward through calibrated mechanical side release vents and internal perforated baffles. The energy of the impact is converted into pneumatic displacement rather than an elastic trampoline bounce. Because this process exposes the fabric to intense air pressure spikes and heavy friction from bike tires, ski edges, and studded pedals, the underlying base textiles must deliver immense shear, tear, and tensile strength.

From our experience on training grounds, if the material used in the upper layer lacks sufficient thickness or puncture resistance, metal pedal pins and ski edges will slice through the outer vinyl. This results in rapid air loss and compromises structural safety. Using verified commercial materials ensures consistent progression, whether training at world-class freestyle facilities highlighted in our airbag jump locations guide or reviewing regional venues in the best snowboard airbag parks.

Quick Summary: The 6 Key Materials at a Glance

The table below provides a quick reference to the six essential materials used in professional inflatable crash mats, detailing their structural roles, technical ratings, and primary failure points prevented:

Key Material ComponentStandard Material SpecificationPrimary Engineering RoleCritical Failure Point Prevented
1. Heavy-Duty Topsheet Tarpaulin0.9mm PVC (1000D x 1000D / 30oz)Direct impact, sliding friction, puncture resistanceSlices from bike pedals, metal ski edges, friction burns
2. Structural Airbag Chamber Tarpaulin0.55mm PVC (1000D / 18oz blockout)Maintains structural body, pressure containmentPneumatic chamber ruptures, seam creep, fabric blowouts
3. Internal Flow-Control BafflesPerforated 0.55mm PVC / 840D OxfordRegulates air transfer between chambers; keeps shapeBallooning deformation, unmetered pocket collapse
4. High-Tenacity Industrial ThreadBonded Nylon / Polyester (V-92 to V-138)Multi-needle interlocked seam joinsSeam splitting during high-pressure impact surges
5. High-Tensile Anchor Webbing & RingsSeatbelt-grade Nylon + 316 Stainless D-RingsGround staking, wind ballast, tensioningAirbag sliding off slopes, wind displacement, anchor tear-out
6. Calibrated Pressure Relief VentsIndustrial hook-and-loop + reinforced meshControls air exhaust velocity during compressionDangerous trampoline rebound, hard bottoming out

In-Depth Analysis: The 6 Key Materials Used in Professional Inflatable Crash Mats

1. Heavy-Duty 0.9mm PVC Wear Topsheet

The topmost layer of an impact mat takes direct punishment from equipment and athletes. A standard vinyl bounce-house fabric (typically 0.4mm to 0.45mm thick) will tear within days when hit by mountain bike tires, studded pedals, or sharp ski edges. Professional crash mats use a replaceable, heavy-duty 0.9mm (1000D x 1000D, 30oz/yd²) knife-coated polyvinyl chloride (PVC) tarpaulin.

In our testing, knife-coated PVC tarpaulin outperforms laminated alternatives. In cheap laminated materials, a plastic film is merely glued onto a loose polyester mesh; under high friction, the clear film peels away from the scrim in a process called delamination. A knife-coated tarpaulin embeds liquid PVC deep into the polyester weave under heat and pressure, creating an integrated composite that resists surface abrasion, prevents friction burn on human skin, and withstands harsh freeze-thaw cycles without cracking. For high-speed cycling runs, review our engineering breakdowns in the mountain bike airbag landing guide and the dedicated inflatable MTB airbag solutions review.

2. Structural 0.55mm PVC Chamber Tarpaulin

While the top sheet handles external abrasion, the lower chambers maintain structural stability. The main inflatable body utilizes high-grade 0.55mm (18oz/yd²) PVC tarpaulin. This textile features a high-density, high-tenacity polyester woven scrim core (typically 1000 Denier woven at 20×20 or 23×23 threads per square inch) coated on both sides with flame-retardant, UV-stabilized PVC.

Tensile and tear strengths are critical here. Professional 0.55mm tarpaulins withstand tensile loads exceeding 2,500 N/5cm and tear strengths above 300 N under ISO 13934-1 testing. This structural strength allows the lower base chamber to remain firm under constant high static pressure, ensuring that when an athlete lands off-balance, the bottom of the mat provides stable support without collapsing. This reliable foundation is essential whether setting up a massive Halfpipe Airbag or analyzing landing dynamics in our freestyle airbag guide.

3. Internal Flow-Control Baffles (Pneumatic Tuning)

An inflatable crash mat is not an empty hollow balloon. If it were built without internal partitions, blowing air inside would force it into a round sphere, and landing on one side would send all internal air to the opposite end, causing the landing zone to bottom out completely. The shape and compression curve of the mat are controlled by internal vertical and horizontal baffles.

These baffles are constructed from perforated 0.55mm PVC or high-tenacity 840D ripstop Oxford cloth, strategically welded and double-stitched between the internal walls. The precision-cut holes within the baffles act as metered pneumatic orifices. When a rider impacts the surface, air flows through these baffle vents at a calculated rate, controlling internal air transfer. This engineering preserves a flat landing surface while delivering smooth, progressive deceleration during heavy impacts.

4. Bonded Industrial Filaments and Reinforced Seam Chemistry

An inflatable is only as reliable as its seam connections. Standard consumer stitching uses light spun-polyester threads that rot when exposed to outdoor moisture and snap under pressure surges. Professional inflatable manufacturing mandates bonded continuous-filament nylon or polyester threads, typically sizing from V-92 up to V-138 (Tex 90 to Tex 135).

Bonded threads undergo a specialized resin treatment that bonds the filament plies together, preventing friction fraying during high-speed sewing through thick 0.9mm PVC. Critical stress seams—including internal baffle anchors and structural corners—are sewn using double-needle or quadruple-needle interlocked lockstitch patterns, delivering stitch densities of 4 to 5 stitches per inch. Furthermore, critical seams feature hot-air welded PVC reinforcing strips laid over the stitch lines to protect threads from moisture rot and mechanical abrasion.

5. High-Tensile Anchor Webbing and 316 Stainless Steel D-Rings

A giant inflatable landing mat presents a massive surface area to ambient winds. A light crosswind on an unsecured 50-foot landing bag can exert thousands of pounds of lateral force, dragging the unit off its landing hill. Structural anchoring hardware is a primary safety component.

Commercial airbags use multi-ply seatbelt-grade nylon or polyester webbing boasting tensile break strengths of 2,500 kg to 4,500 kg (5,500 to 10,000 lbs). This webbing is stitched directly into the lower perimeter beams using wide load-spreading reinforcement patches. The tie-down points terminate in heavy 8mm to 10mm thick, drop-forged 316-grade marine stainless steel D-rings. Unlike cheap zinc-plated wire-formed rings that bend open under wind loads, forged stainless D-rings resist rust and hold fast when secured to ground stakes, earth anchors, or concrete ballast blocks on extreme slope terrains like those detailed in our MTB airbag landing system.

6. Calibrated Mechanical Pressure Relief Air Vents

The sixth key material component is the air exhaust venting system. A completely sealed vinyl envelope would act like an over-inflated tire, bouncing the rider back into the air with dangerous rebound force. Controlled air expulsion is what makes an airbag safe.

Professional bags use adjustable mechanical exhaust vents built with industrial-grade wide hook-and-loop fastening flaps, heavy vinyl sliding collars, and debris-blocking polyester mesh screens. Facility technicians adjust the vent openings based on rider weight and ambient temperature: open the vents wider for heavier mountain bike landings, or close them down for lighter gymnasts. This venting system ensures that air exhausts smoothly under dynamic load, providing comfortable, predictable landings every time.

Material Comparison Matrix: Professional Airbag vs. Cheap Inflatables vs. Foam Pits

To evaluate which landing setup matches your facility’s operational demands, review the physical and commercial metrics below:

Evaluation ParameterProfessional Dual-Chamber AirbagBudget Single-Chamber InflatableTraditional Open-Cell Foam Pit
Topsheet Fabric Spec0.9mm (1000D / 30oz) knife-coated PVC0.4mm (500D) laminated vinyl / OxfordNone (Exposed polyurethane cubes)
Chamber Air ControlDual-chamber + adjustable exhaust ventsSingle chamber; unmetered expulsionMechanical foam block compression only
Hygiene & CleanlinessImpervious surface; wipe clean with disinfectantModerate; seams trap moisturePoor; foam dust, sweat, and debris traps
Fire Retardancy StandardCertified EN 13501-1 / NFPA 701 compliantUncertified or basic flame retardantSevere fire hazard (polyurethane foam)
Expected Commercial Lifespan5 to 8+ years (Replaceable topsheet)1 to 2 seasons before seam failure1 to 2 years before foam crumbling
Hourly Throughput RateRapid (Riders slide/walk off in 5 seconds)Moderate to SlowExtremely Slow (Struggling out of foam)

Pros and Cons of Professional Inflatable Crash Mats

Weigh the operational advantages and engineering trade-offs of investing in a commercial-grade inflatable crash system:

Operational Advantages (Pros)Facility Demands & Constraints (Cons)
Superior Multi-Sport Safety: Absorbs high-energy drops from bikes, snowboards, and athletes without bottoming out.Continuous Power Requirement: Requires reliable electrical blowers to maintain internal air pressure.
Replaceable Modular Topsheet: Heavy wear stays on the upper sheet, preserving the main airbag body for years.Anchoring Discipline: Demands proper ground staking and wind ballast monitoring outdoors.
High Commercial Throughput: Athletes slide or ride off the smooth vinyl surface in seconds, keeping lines moving.Higher Initial Capital Investment: Commercial 0.9mm PVC construction costs more upfront than cheap single-layer inflatables.
Zero Fire Hazards vs. Foam: Certified flame-retardant vinyl eliminates the massive fire risks of traditional foam pits.Deflation & Storage Overhead: Heavy industrial PVC mats require dedicated hand trucks or forklifts to move when rolled.

Who Needs Heavy-Duty Commercial Airbags vs. Basic Foam Systems

In our experience consulting with sports academies and commercial adventure parks, equipment specifications must match your operational environment and insurance requirements.

Who Needs Professional 0.9mm/0.55mm PVC Airbag Systems:

  • Commercial Mountain Bike & Moto Parks: Training riders on heavy downhill bikes or dirt bikes demands the thick puncture resistance of 0.9mm PVC. Explore our dedicated landing airbag solutions and high-impact motorcycle airbag systems 2026 setups.
  • Commercial Trampoline & Action Sports Parks: Transitioning away from dirty, fire-prone foam pits cuts insurance premiums and boosts hourly admissions. Evaluate operating economics in our reports on trampoline park construction cost and trampoline park owner income.
  • Gymnastics & Cheerleading Facilities: High-repetition vault and dismount drills require smooth landing pads that reduce joint fatigue. Discover training solutions with our specialized gym airbag for training.
  • Commercial Stunt & Freestyle Shows: Traveling stunt teams running high-drop shows demand reliable, fast-inflating gear like our inflatable jump airbag.

Who Can Use Simpler Foam or Basic Mats:

  • Low-Impact Home Play Areas: Small children practicing forward rolls in living rooms need only lightweight folding EVA tumbling mats.
  • Low-Elevation Bouldering Walls: Bouldering gyms with fall heights under 10 feet operate effectively using dense, dual-density bonded carpet-foam flooring.

Featured Commercial Equipment: Sunparkairbag Inflatable Crash Pad

Sunparkairbag Inflatable Landing Crash Mat for Action Sports

Constructed with medical-precision welding and heavy-duty materials, the Sunparkairbag Inflatable Crash Pad is engineered specifically for action sports parks, bike progression centers, and gymnastics facilities. Designed with a dual-chamber configuration and protected by an ultra-tough 0.9mm PVC top wear sheet, it delivers reliable impact absorption, high puncture resistance, and long-term durability across high-traffic operations.

Chamber Material: Structural 0.55mm Heavy-Duty PVC Tarpaulin
Topsheet Material: Ultra-Tough 0.9mm (30oz) Wear-Resistant PVC Tarpaulin
Safety Certifications: Flame-retardant, UV-protected, Lead and Phthalate free
Dimensions: Fully Customizable to match facility ramp geometries
Workmanship: Built by master technicians with 5+ years of specialized experience
Included Accessories: Commercial continuous blowers, repair kits, heavy-duty transport bags
Export Classification: International HS Code: 9506990000

View complete engineering specifications on the official Best Crash Pad for Sale product page.

Costly Mistakes Buyers Make When Sourcing Inflatable Airbags

In our field inspections of damaged landing bags, premature failures almost always stem from four common procurement shortcuts:

  1. Accepting Laminated PVC Instead of Knife-Coated Tarpaulin: Unscrupulous factories quote cheap prices by substituting laminated PVC for genuine knife-coated tarpaulin. Laminated PVC separates when wet or flexed repeatedly, causing the clear outer film to bubble and peel off the inner scrim within three months of daily use. Always specify knife-coated tarpaulins.
  2. Overlooking Internal Baffle Materials: Buyers often inspect the exterior vinyl while ignoring internal construction. Low-tier manufacturers sew internal baffles using thin, non-woven fabrics or scrap materials to cut costs. Under heavy drop impacts, these internal baffles rip loose, causing the mat to deform into an uncontrollable balloon that cannot support flat landings.
  3. Purchasing Single-Chamber Bouncy-Castle Builds for High Drops: Purchasing a single-chamber inflatable for action sports is an extreme safety liability. If a single-chamber bag loses power or an intake flap jams, the bag deflates completely. Professional mats mandate a sealed or independently pressurized lower chamber that stays rigid, keeping riders safe even during power disruptions.
  4. Ignoring UV and Cold-Crack Additive Ratings: Operating landing bags outdoors exposes vinyl to sunlight and winter temperatures. Standard commercial PVC turns brittle at freezing temperatures, cracking when flexed. Demand documentation confirming cold-crack resistance down to -20°C and UV stabilizer additives that prevent chalking and fading under direct summer sun.

Commercial Sourcing & Procurement Considerations for Facility Operators

Before issuing a deposit or approving factory production drawings, verify these four essential quality benchmarks with your supplier:

  • Certified Fire Safety Compliance: Commercial indoor sports venues must comply with strict fire codes. Demand laboratory flammability test certificates verifying compliance with NFPA 701, DIN 4102 B1, or EN 13501-1 standards. Installing non-certified plastics will fail local fire marshal inspections.
  • Chemical Safety & Phthalate Restrictions: Athletes make direct skin contact with landing sheets. Ensure all PVC coatings are certified lead-free, non-toxic, and free of restricted ortho-phthalates according to REACH (EU) and CPSIA (US) consumer safety regulations.
  • Replaceable Topsheet Connection Architecture: A landing bag’s topsheet is a wearable component. Ensure it secures to the main chamber using heavy 2-inch to 4-inch wide hook-and-loop strips paired with reinforced perimeter bungee tensioners, allowing simple on-site replacement without retiring the main airbag body.
  • Complete Factory Accessory Provisioning: Confirm that the purchase order includes matched commercial blowers (CE/UL certified), heavy-duty PVC transport storage bags, and an extensive repair kit containing spare 0.9mm/0.55mm material swatches, industrial vinyl adhesives, and seam needles.

Expert Recommendation and Purchasing Verdict

In most professional situations, we recommend treating your landing airbag as life-safety equipment rather than an ordinary gym mat. The money saved by buying a cheap, light-gauge inflatable from an unverified supplier will be lost many times over in seam repair downtime, torn topsheets, and catastrophic rider injuries.

If your facility operates an action sports progression setup, a commercial trampoline park, or an outdoor freestyle training ramp, insist on the proven dual-chamber standard: a heavy-duty 0.9mm knife-coated PVC topsheet for friction resistance, paired with a 0.55mm high-tenacity structural chamber body, bonded V-138 industrial stitching, and calibrated pressure relief venting. Sourcing directly from an established, specialized manufacturer like Sunparkairbag ensures you receive certified materials, master-level seam welding, and custom engineering that protects athletes and keeps your facility running safely season after season.

Frequently Asked Questions (FAQ)

What are the main materials used in professional inflatable crash mats?

Professional inflatable crash mats are built from six key materials: 1) Heavy-duty 0.9mm (30oz) knife-coated PVC tarpaulin for the protective topsheet; 2) Structural 0.55mm (18oz) PVC tarpaulin with a 1000D polyester scrim for the body; 3) Perforated internal airflow baffles; 4) Bonded continuous-filament nylon/polyester threads (V-92 to V-138); 5) Industrial seatbelt-grade nylon webbing with 316 stainless steel D-rings; and 6) Calibrated hook-and-loop adjustable exhaust vents.

Why is 0.9mm PVC tarpaulin used on the topsheet instead of standard vinyl?

The topsheet takes extreme abuse from sharp mountain bike pedals, knobby tires, metal ski edges, and sliding bodies. Standard commercial vinyl (0.4mm–0.5mm) tears easily under high shear forces. The 0.9mm knife-coated tarpaulin provides superior puncture resistance, tear strength, and sliding friction durability, protecting the primary inflatable chambers underneath.

How does an inflatable crash mat prevent an athlete from bottoming out?

Professional crash mats use a dual-chamber pneumatic design. The independent lower base chamber maintains continuous high pressure to create a firm safety floor. The softer upper chamber uses internal baffles and adjustable side relief vents that expel air at a controlled rate, providing smooth, progressive deceleration without bottoming out or bouncing the athlete back into the air.

Can professional inflatable landing mats be used outdoors in freezing winter conditions?

Yes, provided the PVC tarpaulin is formulated with cold-crack additives. High-grade commercial PVC tarpaulins maintain flexibility down to -20°C (-4°F), allowing snowboards and skis to land safely on snow without the vinyl cracking. Ensure that blower motors are kept dry and ice-free during sub-zero operation.

Why are inflatable crash mats replacing open-cell foam pits in modern gyms?

Inflatable crash mats offer significant advantages over foam pits: they eliminate toxic polyurethane foam dust that damages athlete lungs, remove the severe fire hazard associated with loose foam cubes, are easy to sanitize, and allow athletes to exit the landing zone in seconds, drastically increasing hourly training throughput.

Authoritative References

  1. ASTM International: Standard Practice for Design, Manufacture, Operation, and Maintenance of Inflatable Amusement Devices (ASTM F2374)
  2. International Organization for Standardization: ISO 13934-1 Tensile Properties and Tear Resistance of Coated Fabrics
  3. National Fire Protection Association (NFPA): Standard Methods of Fire Tests for Flame Propagation of Textiles and Films (NFPA 701)
6 Steps to Buld MTB Airbag Landing System

6 Steps to Buld MTB Airbag Landing System: The 2026 Expert Guide

The days of relying on filthy, hazardous foam pits or risking catastrophic injuries on unforgiving dirt mulch landings are over. In the modern era of extreme sports, progression requires calculated risk mitigation. Whether you are a commercial bike park operator trying to reduce liability, or an elite athlete pushing the boundaries of freestyle geometry, the necessity for a professional-grade landing surface is non-negotiable. From our experience at SunparkAirbag, engineering advanced pneumatic crash systems globally, attempting to buld Mtb airbag landing system infrastructure without a strict technical blueprint leads to dangerous bottom-outs, misaligned trajectories, and blown seams.

6 Steps to Buld MTB Airbag Landing System

In most professional situations, purchasing the bag is only 30% of the operation; the engineering of the site dictates the safety of the rider. We routinely see facilities invest heavily in premium landing airbag solutions only to place them on poorly graded ground with inadequate kicker transitions. You must use commercial and practical judgment. In this definitive guide, we take an uncompromising, expert stance on the exact 6 steps required to safely and effectively buld Mtb airbag landing system frameworks. We will dissect the material science behind the PVC, explain the critical transition alignments, and ensure your facility operates at peak safety standards.

Quick Answer: How to Deploy Your Airbag System

If you are preparing to buld Mtb airbag landing system setups, you must execute these 6 mandatory phases:

  1. Site Topography & Grading: Ensure a flat or precisely declined dirt/scaffold base to match the bag’s operational pitch.
  2. Kicker Construction & Alignment: Calculate the trajectory to ensure riders impact the sweet spot (middle third) of the airbag.
  3. Base Deployment & Anchoring: Unroll the 0.55mm PVC base and secure all heavy-duty D-rings to ground anchors or concrete blocks.
  4. Power Integration: Connect dedicated, weather-proofed electrical circuits for the continuous-flow blowers.
  5. Top Sheet Tensioning: Secure the 0.9mm PVC top sheet, balancing the tension to allow for impact absorption while remaining firm enough to ride away.
  6. Pressure Calibration & Testing: Adjust the air vents based on rider weight and jump height before opening the feature.

We recommend entirely abandoning single-chamber inflatable designs. For heavy-duty applications, you must specify a dual-chamber system to prevent riders from bottoming out on the ground.

What It Is: The Engineering of MTB Airbags

A professional MTB airbag landing system is a heavily engineered pneumatic structure designed to replicate the contour of a standard dirt landing transition (the “tranny”). Unlike a stunt bag where you land flat on your back and sink, an MTB airbag features a firm, pitched top layer that allows the tires to grip. This enables the rider to land their trick and ride down the ramp smoothly, rather than coming to a dead, sinking halt.

The materials are critical. You are repeatedly dropping a 35-pound bicycle with sharp metal pedals and a 180-pound rider onto a fabric surface. Standard nylon will shred instantly. Commercial bags utilize 0.55mm PVC Tarpaulin for the internal pillars and a massive 0.9mm PVC Tarpaulin for the replaceable top sheet. This material must be flame-retardant, UV-protected, and lead-free.

How It Works: Dual-Chamber Mechanics

How it works dictates whether a rider walks away from a crash or visits the hospital. High-end inflatable MTB airbag solutions utilize dual-chamber technology. The bottom chamber acts as a highly pressurized foundation; it prevents the rider from ever striking the hard earth, even during a catastrophic free-fall. The upper chamber contains internal fabric pillars (baffles) and operates at a lower pressure. It features adjustable exhaust vents. When the rider impacts the top sheet, the air is rapidly expelled through these vents, absorbing the kinetic energy softly before the bottom chamber catches the residual weight.

The 6 Steps to Buld MTB Airbag Landing System

From our experience equipping the best snowboard airbag parks and elite cycling compounds, executing these 6 steps flawlessly is the difference between a premier training facility and a dangerous liability.

Step 1: Site Topography and Grading

You cannot simply drop an airbag on uneven grass. You must grade a specific landing pitch. While some airbags are designed to be freestanding wedges, the safest and most realistic setups utilize a sculpted dirt mound or a wooden scaffold framework shaped to a 30 to 40-degree decline. The airbag drapes over this framework, creating a flawless, rideable transition.

Step 2: Kicker Construction and Gap Calibration

The launch ramp (kicker) dictates the trajectory. A common mistake is building the kicker too close to the bag. You must calculate the parabolic arc of a standard jump. The gap between the lip of the kicker and the front edge of the airbag should allow the rider to comfortably clear the knuckle and land in the middle third (the “sweet spot”) of the airbag. Standard gaps range from 8 to 15 feet depending on the kicker’s radius and speed.

Step 3: Base Deployment and Rigorous Anchoring

Roll out the heavy PVC base. In high-wind environments, an unsecured airbag becomes a massive sail. You must utilize the heavy-duty D-rings installed along the base perimeter. Anchor these using deep ground stakes for dirt setups, or heavy concrete ballast blocks/ratchet straps for concrete or gym floor deployments like a gym airbag for training.

Step 4: Blower and Power Integration

Connect the industrial blowers to the inflation tubes. Because these are continuous-flow systems (air is constantly escaping to absorb impact), the blowers must run without interruption. You must ensure you have a dedicated, non-GFI tripping electrical circuit. Protect the blowers from rain and dust enclosures, ensuring the air intake is never obstructed by debris or leaves.

Step 5: Top Sheet Tensioning

The 0.9mm top sheet is the impact zone. It is attached via heavy-duty Velcro or bungee systems. If you tension it too tightly, the bag will act like a trampoline, bouncing the rider dangerously back into the air. If it is too loose, the tires will sink, and the rider will go over the handlebars. In our testing, finding the perfect medium tension allows the bike to track straight while still absorbing off-axis landings.

Step 6: Pressure Calibration and Vent Adjustment

Before any rider drops in, perform a weighted drop test. Adjust the side ventilation flaps. Opening the flaps makes the landing softer (air escapes faster); closing the flaps makes the landing firmer. Calibrate this pressure based on the average weight of the riders and the height of the kicker. Start firmer and gradually soften the bag based on rider feedback.

Commercial and Athletic Benefits

The primary benefit of utilizing an airbag landing ramp system is the exponential acceleration of athletic progression. Fear of injury paralyzes progression. When riders know they can attempt a double backflip and walk away completely unharmed from a botched landing, they push their limits. For commercial operators researching trampoline park owner income or outdoor bike park revenues, an airbag is a massive draw that justifies premium entry fees and mitigates severe liability claims.

Limitations and Hidden Risks

We must use commercial and practical judgment: these systems have physical limitations. They require constant electricity. If the power grid fails mid-jump, the bag deflates rapidly. Furthermore, the 0.9mm PVC is incredibly tough, but it is not immune to vandalism or extreme negligence. A rider dropping in with a razor-sharp exposed pedal pin or a broken brake lever can tear the top sheet. Strict rules regarding bike condition must be enforced.

Who Should Install These Systems

For Commercial Users and Pro Athletes: Professional freestyle compounds, commercial mountain bike parks, BMX training facilities, and event organizers must deploy these systems. They drastically reduce common BMX injuries and prevention liabilities while providing a spectacle for audiences.

Who Does Not Need One

For Casual Trail Riders: If you strictly ride cross-country trails and keep your tires on the dirt, the significant capital expenditure of an airbag system is unnecessary. Stick to natural terrain.

Common Procurement Mistakes

From our experience, the most catastrophic mistake park builders make is purchasing a flat “stunt bag” (used for falling out of windows in movies) instead of a pitched, rideable landing bag. A flat bag will snap a bike frame upon impact because it does not match the downward trajectory of a landing. You must purchase a model explicitly designed for wheeled sports, featuring a designated downward transition.

Expert Buying Considerations

When reviewing quotes to buld Mtb airbag landing system structures, demand the material specifications. If a supplier cannot prove they use a minimum of 0.55mm PVC for the base and 0.9mm for the top sheet, walk away. Ask about the replacement cost of the top sheet—it is a consumable wear item that you will need to replace every few years depending on traffic. Ensure the blowers are included and certified for your country’s electrical grid (CE/UL approved).

Summary and Comparison Tables

Comparison Table: Airbag vs. Foam Pit vs. Mulch

MetricMTB Airbag SystemFoam PitMulch / Bark Landing
Ride-Away CapabilityExcellent (Allows continuous riding)Zero (Rider sinks, requires extraction)Moderate (Can be ridden out if landed perfectly)
Safety / Injury RiskExtremely Safe (Absorbs off-axis impacts)Safe, but high risk of bikes landing on ridersHigh Risk (Severe impact if crashed)
Hygiene & MaintenanceHigh (Wipe clean PVC, zero dust)Very Poor (Collects sweat, dust, fire hazard)Poor (Rots, requires constant raking)
Throughput (Jumps per Hour)High (Clear the landing in seconds)Low (Takes 5 minutes to climb out)High

Pros and Cons of Inflatable Airbag Landings

Pros (Why you must upgrade)Cons (The operational reality)
Drastically reduces medical liabilities and severe injuries.High initial capital expenditure.
Accelerates rider progression and confidence.Requires continuous, reliable electrical power.
Massive visual marketing draw for commercial bike parks.Top sheet is a wear-item requiring eventual replacement.
Fully portable; can be deflated and moved to new events.Vulnerable to sharp objects or malicious vandalism.

Expert Recommendation & Hardware Spotlight

Is the financial investment required to buld Mtb airbag landing system setups actually worth it compared to a pile of cheap mulch? Emphatically, yes. The return on investment for commercial parks is realized through increased ticket sales, prolonged season passes, and the elimination of severe injury claims. We recommend that buyers strictly avoid generic, unbranded inflatables imported blindly. Partner with a dedicated extreme sports manufacturer that understands the geometry of flight.

SunparkAirbag Mountain Bike Airbag

SunparkAirbag Mountain Bike Airbag

Do not gamble your riders’ safety on inferior materials. The SunparkAirbag MTB Landing is engineered specifically for the extreme kinetic forces of heavy-duty wheeled sports. Utilizing dual-chamber impact technology and industry-leading PVC thickness, it represents the pinnacle of progression infrastructure.

Material: 0.55mm PVC Tarpaulin base / 0.9mm PVC top sheet (Waterproof, Flame-retardant, UV-protected, Lead-free).
Standard Size: 8.5 × 4.5 × 1m (Custom sizing available for mega-ramps).
Customization: Digital, Silk-screen, or UV Printing for heavy brand visibility.
Accessories Included: CE/UL Blower, repair kit, heavy-duty carrying bag.
Manufacturing Lead Time: ~10 working days, backed by 5+ years of specialized airbag engineering experience.

Explore Custom MTB Airbags

For operations looking to diversify their facility, integrating a Halfpipe Airbag or a flat inflatable jump airbag for gymnastics creates a multi-discipline training compound that maximizes revenue per square foot.

Frequently Asked Questions

How much space is required to buld Mtb airbag landing system setups?

In most professional situations, you need a minimum linear footprint of 15 to 20 meters in length and 6 meters in width to safely buld Mtb airbag landing system infrastructure. This footprint accounts for the drop-in, the run-in, the kicker ramp, the gap, the 8.5-meter bag itself, and a safe dirt run-out area to slow down after landing.

Can I leave my MTB airbag outside all year?

While premium models like those from SunparkAirbag use UV-protected, 0.9mm PVC tarpaulin that heavily resists weathering, we strictly recommend covering the deflated bag with a heavy-duty tarp during extreme winter freezes or severe prolonged rainstorms to prolong its operational lifespan and prevent mold accumulation in the vents.

Why is an airbag better than a foam pit?

Foam pits are highly unsanitary, pose severe fire hazards, and require massive manual labor (or cranes) to extract a rider and bike after every single jump. An inflatable MTB airbag landing system allows the rider to land the trick and ride away continuously, drastically increasing the number of practice repetitions per hour without the filthy cleanup.

What happens if the power goes out while someone is jumping?

High-quality dual-chamber airbags are designed with a baseline structural integrity that allows them to hold residual air for a short period. If the power cuts mid-jump, the bag will not instantly vanish; it will deflate slowly, providing enough cushion to absorb the immediate impact of the airborne rider. However, riding must cease immediately until power is restored.

Industry References & Authoritative Safety Guidelines

To ensure our engineering advice aligns with the strictest global safety and structural standards, SunparkAirbag references the protocols established by the following authoritative organizations:

  • ASTM International: The global standards organization that develops and publishes the rigorous consensus technical standards (such as ASTM F2374) outlining the design, manufacture, and operation of inflatable amusement and sports devices. Review ASTM Safety Standards
  • Union Cycliste Internationale (UCI): The world governing body for sports cycling, providing guidelines and facility standards for freestyle BMX and mountain bike track constructions to ensure competitive athlete safety. Review UCI Track Regulations
  • The Royal Society for the Prevention of Accidents (RoSPA): A leading authority providing peer-reviewed risk assessment frameworks and safety guidelines for the operation of extreme sports parks and inflatable equipment. Review RoSPA Leisure Safety
5 Mountain Bike Safety Gear Upgrades Worth Buying

5 Mountain Bike Safety Gear Upgrades Worth Buying

The mountain bike industry suffers from a severe misalignment of priorities. Riders will gladly spend thousands of dollars on carbon fiber wheelsets and electronic shifting drivetrains to shave a few seconds off a descent, yet they completely ignore the structural integrity of their Mountain Bike Safety Gear. From our experience at SUNPARK® AIRBAG, engineering heavy-duty fall protection for the world’s leading action sports facilities, relying on outdated EPS foam helmets and rigid plastic shin guards is a catastrophic miscalculation. When gravity inevitably wins, your derailleurs do not matter; your impact absorption does.

5 Mountain Bike Safety Gear Upgrades Worth Buying

In most professional situations, treating safety equipment as an afterthought leads to season-ending injuries, massive medical bills, and severe liability issues for bike park operators. You must exercise commercial and practical judgment. Upgrading your protection is not about fear; it is about enabling uninhibited progression. Whether you are a private rider looking to safely attempt double black diamond drops, or a commercial facility manager needing to mitigate risk, you must invest in modern, scientifically validated safety infrastructure. In this definitive guide, we take an uncompromising stance on the current state of Mountain Bike Safety Gear, detailing the exact personal and facility-level upgrades you must procure, and explaining why cheaper alternatives are actively endangering your life.

Quick Answer: The 5 Essential Upgrades

If you want to drastically reduce orthopedic and neurological trauma during progression, these are the 5 Mountain Bike Safety Gear upgrades you must invest in immediately:

  1. ASTM F1952 Full-Face Helmet with MIPS: Eliminates rotational sheer forces during oblique impacts. Do not ride downhill in a half-shell.
  2. CE Level 2 D3O Chest & Back Protector: Replaces hard, restrictive plastic with non-Newtonian smart foam that hardens instantly upon impact.
  3. Cervical Neck Brace: Prevents catastrophic spinal hyperextension during over-the-bars ejections.
  4. CE Certified Smart-Foam Knee Guards: Provides pedal-friendly mobility while absorbing direct rock strikes.
  5. Inflatable Progression Infrastructure: Replacing dangerous dirt landings with a bike airbag landing to eliminate the fear and consequence of learning new aerial maneuvers.

We recommend that commercial bike parks and serious freeriders stop relying on outdated foam pits and invest in modern inflatable landing technology to safeguard their progression.

What It Is: Modern Mountain Bike Safety Gear

Modern Mountain Bike Safety Gear encompasses two distinct categories: Personal Protective Equipment (PPE) worn by the rider, and Facility Protective Equipment (FPE) deployed by the venue. Historically, MTB safety was rudimentary. Helmets were basic expanded polystyrene (EPS) foam, and body armor consisted of bulky, restrictive motocross plastics. Today, the landscape is defined by intelligent materials. Wearable safety gear now utilizes non-Newtonian polymers that remain soft and pliable during normal riding but lock their molecular structure instantly upon impact to disperse kinetic energy.

On the facility side, the archaic and highly unsanitary foam pit is being universally replaced. As highlighted in our foam pit vs airbag comparison, commercial operators now rely on highly engineered, multi-chamber PVC inflatable landing systems to catch riders safely, allowing them to ride out of their tricks rather than sinking into a trap of dirty foam cubes.

How It Works: The Physics of Impact Absorption

How it works depends on the specific upgrade. Take rotational impact systems like MIPS (Multi-Directional Impact Protection System) found in modern full-face helmets. During a crash, your head rarely hits the ground at a perfect 90-degree angle. It hits at an angle, causing the brain to rotate violently inside the skull, which causes severe concussions. MIPS utilizes a low-friction slip plane inside the helmet that allows the helmet to rotate independently of your head, absorbing the sheer force.

Facility upgrades operate on air dissipation mechanics. A big jump airbag system utilizes an upper landing chamber and a lower base chamber. When a rider lands heavily, the internal air pillars absorb the kinetic mass, and precise air vents release the pressure at a controlled rate. This decelerates the rider smoothly without the violent rebound effect associated with cheap bouncy castles. It is pure, engineered physics applied to action sports.

The Benefits of Professional Grade Protection

The primary benefit of upgrading your Mountain Bike Safety Gear is the absolute mitigation of catastrophic injury. In our testing, riders equipped with CE Level 2 back protection and MIPS helmets walk away from high-speed crashes that would otherwise result in hospitalizations. For commercial users and bike park operators, upgrading to a professional inflatable crash mat or airbag landing directly correlates to increased revenue. Riders will pay premium ticket prices to practice on safe, modern infrastructure where the fear of injury is removed.

Limitations and Operational Realities

We must use commercial and practical judgment: heavy-duty safety gear has physical limitations. The primary limitation of full-face helmets and D3O body armor is heat retention. If you are pedaling a 20-mile cross-country loop in 90-degree heat, wearing a downhill-rated chest protector will cause severe hyperthermia and exhaustion. Safety gear must be matched precisely to the discipline. Likewise, for facility upgrades, a stunt airbag landing requires a continuous power supply for the blowers and regular maintenance to ensure the PVC tarpaulin remains puncture-free.

Who Should Use These Upgrades

For Commercial Users and Freeriders: If you are hitting gap jumps, riding lift-accessed downhill parks, or attempting aerial maneuvers, this 5-point upgrade list is mandatory. Furthermore, if you manage a training facility or a trampoline park, consulting with elite trampoline park equipment manufacturers to integrate heavy-duty airbags is a non-negotiable operational requirement to lower your insurance liability premiums.

Who Does Not Need Heavy-Duty Gear

For Beginners on Flat Trails: If your riding consists entirely of flat, non-technical gravel paths or smooth cross-country singletrack, a heavy full-face helmet and a neck brace are severe overkill. A high-quality half-shell helmet with MIPS and lightweight knee sleeves is entirely sufficient for low-speed, low-consequence environments.

Common Procurement Mistakes

From our experience, the most devastating mistake a rider can make is buying a used helmet. EPS foam is designed for a single catastrophic impact. Even if a used helmet looks pristine on the outside, the internal foam structure may be compressed and entirely useless. Never buy used PPE.

For commercial operators, a frequent error is searching for buy used airbag landing tips without understanding the lifespan of PVC and UV degradation. Buying an old, heavily sun-damaged airbag from an unknown manufacturer is an immense liability. You must source factory-direct equipment with verified fire-retardant and UV-protected certifications.

Expert Buying Considerations

When purchasing body armor, you must verify the CE EN1621 certification level. Level 1 is basic protection. For heavy-duty applications, you must demand CE Level 2, which transmits significantly less force to the body. When evaluating facility infrastructure, review our mountain bike airbag landing guide to ensure you are specifying the correct 0.55mm and 0.9mm PVC Tarpaulin thicknesses required to withstand the sharp impact of bicycle pedals and chainrings.

Summary and Comparison Tables

Quick Summary Table: Core Safety Upgrades Evaluated

Safety UpgradePrimary FunctionCrucial Buying MetricBest Application
MIPS Full-Face HelmetPrevents traumatic brain injury and facial fractures.ASTM F1952 CertificationDownhill, Enduro, Dirt Jumping
Smart-Foam Body ArmorAbsorbs torso impacts while allowing mobility.CE EN1621 Level 2 RatingBike Parks, Freeride
Cervical Neck BraceLimits dangerous head movement during crashes.Adjustability & FitmentHigh-speed Downhill Racing
Inflatable Airbag LandingProvides a safe, rideable catch for extreme jumps.0.9mm PVC Top Sheet DurabilityProgression Parks, Training Facilities

Pros and Cons of Commercial Airbag Landings

Pros (Why you must upgrade)Cons (The operational reality)
Eliminates catastrophic injuries during trick progression.Requires upfront capital expenditure compared to dirt.
Highly hygienic compared to bacteria-filled foam pits.Requires continuous electricity to operate the blowers.
Allows riders to practice landing and riding away smoothly.Requires daily visual inspections for pedal punctures.
Massive draw for paying customers at commercial bike parks.Large footprint requires dedicated space planning.

Expert Recommendation & Hardware Spotlight

Is investing in elite Mountain Bike Safety Gear actually worth the exorbitant cost? Unquestionably. Medical deductibles cost infinitely more than a $300 helmet. We recommend that riders strictly prioritize their protective equipment budget before upgrading their bicycle components. For commercial operators and serious athletes, the ultimate safety upgrade is not something you wear; it is what you land on.

By transitioning from dangerous dirt jumps to specialized bike airbag landing systems, you completely alter the progression curve. Whether you are hitting a standard kicker or requiring a massive FMX airbag landing for motorized dirt bikes, SUNPARK® AIRBAG delivers the uncompromised industrial quality required to keep riders safe.

MTB Jump Airbag Landing System by SUNPARK

MTB Jump Airbag Landing

Do not compromise on the safety of your athletes or your commercial clients. The SUNPARK MTB Jump Airbag is engineered with heavy-duty PVC to withstand the sharpest bike pedals and extreme impacts, providing the ultimate ride-out progression tool.

  • Heavy-Duty Material: 0.55mm PVC Tarpaulin for the main airbag, with a reinforced 0.9mm PVC Tarpaulin top sheet.
  • Industrial Safety: Water-proof, flame-retardant, UV-protected, lead, and phthalate-free construction.
  • Complete Customization: Customizable sizing, colors, and Digital/Silk-screen branding for your park.
  • Rapid Production: Manufactured in approximately 15 working days by experts with 5+ years of specialized experience.
  • Turnkey Package: Includes heavy-duty blowers, repair kit, and a strong carrying bag.

Explore the MTB Airbag Landing

If you are exploring options for motorized sports alongside mountain biking, ensure you review our dirt bike airbag landing solutions to handle the increased weight and kinetic energy of heavy machinery.

Frequently Asked Questions

What is the most important Mountain Bike Safety Gear?

The most critical piece of Mountain Bike Safety Gear is an ASTM F1952 certified full-face helmet equipped with a rotational impact protection system like MIPS. Following personal gear, a commercial-grade airbag landing system is the most important facility-level safety upgrade for trick progression.

Is a neck brace worth it for mountain biking?

Yes. In most professional situations involving downhill racing, freeride, or dirt jumping, a neck brace drastically reduces the risk of cervical spine hyperextension and compression during severe over-the-bars crashes. It is a mandatory upgrade for heavy-duty gravity applications.

Are MTB airbags safe for learning backflips?

Absolutely. An inflatable crash mat or a dedicated bike airbag landing is explicitly designed for this. It absorbs the kinetic energy of a crash smoothly, allowing riders to attempt high-risk maneuvers like backflips without the catastrophic orthopedic risks associated with landing incorrectly on compacted dirt.

How often should I replace my mountain bike helmet?

You must replace your helmet immediately after any significant impact where the head strikes the ground. Even if there is no visible damage, the internal EPS foam has compressed. If un-crashed, industry standards dictate replacing the helmet every 3 to 5 years due to UV degradation and sweat breaking down the materials.

Industry References & Authoritative Guidelines

To ensure our safety recommendations meet rigorous global standards, SUNPARK® AIRBAG references the protocols established by the following authoritative organizations:

  • ASTM International: The global standards organization that publishes the ASTM F1952 standard specification for downhill mountain bicycle helmets, dictating strict chin bar testing and impact attenuation. Review ASTM F1952 Standards
  • Consumer Product Safety Commission (CPSC): The federal regulatory body defining the mandatory safety and testing requirements for all bicycle helmets sold within the United States. Review CPSC Helmet Regulations
  • National Institutes of Health (NIH / PubMed): Peer-reviewed medical literature detailing the biomechanics of spinal and neurological trauma in downhill mountain biking, and the efficacy of modern protective equipment. Review MTB Injury Medical Data
What is More Traumatic: Skiing or Snowboarding

What is More Traumatic: Skiing or Snowboarding? An Expert Biomechanical Analysis

Gravity does not discriminate, but the equipment strapped to your feet drastically alters how your body absorbs an impact. When evaluating what is more traumatic on the mountain, winter sports enthusiasts often rely on anecdotal horror stories rather than biomechanical facts. At Sunparkairbag, we engineer professional-grade impact attenuation systems for action sports. We observe thousands of landings, crashes, and recoveries every season. We do not deal in assumptions; we deal in the physics of deceleration and joint stress.

What is More Traumatic: Skiing or Snowboarding

In most professional situations, asking what is more traumatic between skiing and snowboarding requires dividing the human body in half. Because skiers have independent leg movement and use poles, their lower extremities act as massive levers that torque the knee joint. Snowboarders, conversely, are bolted to a single plane. When a snowboarder falls, the board acts as a fixed anchor, forcing the upper body—specifically the wrists, collarbones, and shoulders—to bear the brunt of the kinetic energy. If you are trying to make a commercial or personal decision regarding which sport to pursue, or how to design a safe training facility, understanding what is more traumatic for specific muscle groups is your first operational requirement.

Quick Answer: What is More Traumatic?

The answer to what is more traumatic depends entirely on which part of your body you are trying to protect. Neither sport is universally safer, but they possess distinctly different trauma profiles:

  • Skiing is more traumatic for the knees and lower extremities. The independent movement of the skis creates devastating rotational torque during a fall, leading to a high incidence of Anterior Cruciate Ligament (ACL) and Medial Collateral Ligament (MCL) ruptures.
  • Snowboarding is more traumatic for the upper body and ankles. Because both feet are strapped to a single board, a snowboarder cannot “step out” of a fall. The instinct to brace a forward or backward edge-catch results in severe wrist fractures, dislocated shoulders, and broken clavicles.

We recommend utilizing proper protective gear and off-season progression training—such as landing on large-scale inflatable airbags—to mitigate the severe traumas inherent to both disciplines.

What It Is: The Biomechanics of Winter Sports Trauma

To definitively state what is more traumatic, we must define the biomechanical failure points. In skiing, the boot is designed to release from the binding when subjected to a specific threshold of lateral or upward force (DIN setting). However, this release mechanism is not infallible. When a skier catches an inside edge, the ski acts as a 170-centimeter lever arm attached directly to the tibia. If the binding does not release instantly, the rotational force bypasses the rigid ski boot and attacks the knee joint. This is why “skier’s knee” (ACL tearing) is the most heavily documented trauma in the sport.

Snowboarding trauma is structurally different. A snowboard binding does not feature an automatic release mechanism. You are permanently attached to the board until you manually unstrap. Therefore, determining what is more traumatic for a snowboarder involves looking at blunt force trauma and impact bracing. When a snowboarder catches a heel edge, they are slammed backward, resulting in concussions and tailbone fractures. When they catch a toe edge, they are slammed forward. The human instinct is to throw the hands out to break the fall, sending the entire kinetic load into the radius and ulna bones of the forearm, causing a Colles’ fracture (broken wrist).

How It Works: The Physics of the Crash

How a crash develops dictates what is more traumatic in the immediate aftermath. For commercial users operating terrain parks or training facilities, understanding trajectory is vital. A skier approaching a jump who loses balance mid-air will often suffer a “yard sale”—a chaotic disbursement of skis, poles, and body parts. The trauma here is often multi-directional.

A snowboarder in the air acts as a single pendulum. If they over-rotate a backflip, they cannot ditch the equipment. They will land on the hardpack snow bearing the full weight of the board attached to their feet, which frequently results in “snowboarder’s ankle” (a fracture of the lateral process of the talus). In our testing of aerial maneuvers, we see identical crash mechanics when evaluating common BMX injuries and prevention. In both disciplines, being locked into the equipment fundamentally changes the trauma profile.

Professional Training Solutions to Mitigate Trauma

From our experience, the only guaranteed way to reduce what is more traumatic on the mountain is to remove the hardpack snow from the learning equation entirely. You do not learn a double backflip on ice; you learn it on a highly engineered pocket of air.

Low Height Inflatable Ski Airbag for Kids & Beginner Training

Low Height Inflatable Ski Airbag for Kids & Beginner Training

Designed specifically to eliminate the fear of impact, this airbag system is the ultimate tool for safely progressing in winter sports without the associated joint trauma.

  • Material: 0.55mm PVC Tarpaulin for airbag, 0.9mm PVC Tarpaulin for top sheet (water-proof, flame-retardant, UV-protected).
  • Safety Standards: Lead and phthalate free construction.
  • Customization: Fully customized sizing and digital/silk-screen printing available for commercial parks.
  • Workmanship: Built by skilled workers with 5+ years of experience in heavy-duty airbag manufacturing.
  • Accessories Included: High-powered blower, repair kit, heavy-duty carrying bag.

View Ski Training Airbag Specs

Benefits of Identifying Trauma Risks

Knowing what is more traumatic allows you to deploy targeted prophylactic measures. If you are a snowboarder, acknowledging the extreme risk to your wrists means you can proactively purchase reinforced wrist guards and impact shorts for your tailbone. If you are a skier, knowing the risk to your ACL forces you to focus on off-season hamstring and quad strengthening to stabilize the knee joint.

For commercial users, such as ski resort managers, understanding these risks justifies the capital expenditure for advanced training infrastructure. Investing in landing airbag solutions drastically reduces the liability and insurance premiums associated with high-trauma terrain park injuries.

Limitations of Protective Equipment

We must apply commercial and practical judgment: wearing a helmet and wrist guards does not make you invincible. The limitation of protective gear is that it only addresses blunt force impact, not rotational torque. A knee brace will not stop a ski from acting as a lever and snapping an ACL if the DIN setting on the binding is too tight. Similarly, wrist guards might prevent a bone fracture during a snowboard crash, but the kinetic energy simply travels up the arm, potentially resulting in a dislocated shoulder instead. You cannot defeat physics; you can only displace it.

Who Should Ski vs. Who Should Snowboard

If you have a history of severe knee injuries, meniscus tears, or ACL reconstructions, who does not need to ski is you. The independent leg movement will eventually expose your pre-existing weaknesses. We recommend snowboarding for individuals with compromised knees, as both legs are locked in a static, slightly bent stance that limits independent internal rotation.

Conversely, for beginners with a history of wrist fractures, collarbone breaks, or rotator cuff issues, skiing is the safer initial choice. The ability to use poles for balance and to step your foot out to catch yourself prevents the violent upper-body slams associated with learning to snowboard.

Common Mistakes Leading to Injury

In most professional situations, the trauma we witness is entirely preventable. The most common mistake beginners make is skipping progression. They attempt features on hard snow that they have not mastered in a controlled environment. Another massive mistake is bracing a fall with straight, locked arms. Whether you are on skis, a snowboard, or utilizing an inflatable jump airbag, you must learn to “tuck and roll.” Dissipating energy across the broad muscles of the back and shoulders is always safer than focusing the entire impact on the tiny bones of the wrist.

Commercial Buying Considerations for Training Parks

If you are building a commercial extreme sports facility or a Halfpipe Airbag setup, evaluating what is more traumatic dictates your airbag specifications. Skiers carry long, sharp edges that can slice through inferior materials. Snowboarders land with broad, heavy impacts. For heavy-duty applications, you must demand a 0.9mm PVC Tarpaulin top sheet. If you are calculating the ROI for your facility, reviewing trampoline park owner income models will show that offering safe, low-trauma progression areas is the highest-margin revenue driver.

Comparison Table: Trauma Profiles

Injury MetricSkiingSnowboarding
Most Common Severe InjuryACL / MCL Rupture (Knee)Radius / Ulna Fracture (Wrist)
Primary Cause of TraumaRotational torque from independent skisBlunt impact from edge catching
Equipment ReleaseBindings release under forceRider remains locked to the board
Beginner Injury RateModerate (Easier initial learning curve)High (Frequent, hard falls early on)
Protective Gear FocusKnee braces, highly calibrated bindingsWrist guards, impact shorts, helmets

Pros and Cons Table: Ski vs. Snowboard Safety

SportSafety ProsSafety Cons
SkiingEasier to catch balance with independent legs. Bindings release during a crash to prevent severe limb trapping. Forward-facing stance offers better peripheral vision.High risk of complex ligament tears. Crisscrossing skis can cause severe tripping hazards. Knee surgeries require lengthy 9-12 month rehabilitations.
SnowboardingMinimal rotational stress on the knees. Only one edge to manage per turn. No poles to lose or impale yourself on during a crash.Blind spots on the heel-side turn. Inability to step out of a fall. Extremely high risk of concussions and wrist fractures for beginners.

Expert Recommendation

Ultimately, determining what is more traumatic is a matter of anatomical preference. From our experience, neither sport is “safe” if practiced recklessly. If you value your knees above all else, snowboard. If you value your wrists and upper body, ski. However, our definitive expert recommendation is to mitigate the trauma of both disciplines by utilizing modern training infrastructure. Visit one of the best snowboard airbag parks to dial in your aerial awareness before you ever take a jump to hardpack snow. The most effective safety equipment on the mountain is the muscle memory you build in a risk-free environment.

Frequently Asked Questions

Is it safer to ski or snowboard for beginners?

For absolute beginners, skiing is generally less traumatic on the first day. The ability to move your legs independently and face forward feels more natural. Snowboarding beginners will spend their entire first day falling hard on their wrists and tailbones as they learn to manage edge control.

Why are knee injuries so common in skiing?

Skis act as long levers attached to your feet. If you catch an edge and your binding does not release, the twisting force bypasses the rigid ski boot and transfers directly into the knee, which is not designed to rotate laterally, resulting in ACL and MCL tears.

Can an airbag prevent injuries in winter sports?

Yes. In most professional situations, athletes use massive inflatable airbags to practice new, high-risk maneuvers. An airbag absorbs the kinetic energy of a crash, allowing the rider to fail safely and build muscle memory without the severe trauma associated with landing on compacted snow.

Are wrist guards actually effective for snowboarding?

Yes. Studies consistently show that wearing rigid wrist guards significantly reduces the incidence of wrist fractures in snowboarders, particularly beginners. They displace the focused impact energy away from the fragile bones of the wrist and distribute it up the forearm.

Industry References & Authoritative Sources

To ensure our biomechanical analysis meets the highest standards of accuracy and E-E-A-T, we reference data from the following authoritative medical and sports organizations:

  • National Institutes of Health (NIH) / PubMed: Clinical epidemiology studies detailing the distinct injury patterns and joint trauma prevalence in alpine skiing versus snowboarding. View NIH Sports Trauma Research
  • American Academy of Orthopaedic Surgeons (AAOS): Guidelines and statistical reporting on winter sports injuries, prevention strategies, and the efficacy of protective equipment. View AAOS Winter Sports Safety Guidelines
  • International Ski and Snowboard Federation (FIS): Global injury surveillance system data tracking elite athlete trauma profiles and terrain park safety standards. View FIS Medical and Safety Data
7 Sports Training Attractions That Draw More Visitors

7 Sports Training Attractions That Draw More Visitors

Facility owners frequently ask us why their repeat visitor rate is flatlining after their first two years of operation. The harsh reality of the indoor recreation industry is that standard trampoline courts and passive play areas no longer guarantee long-term profitability. Visitors get bored with static entertainment. To drive recurring revenue, your facility must transition from offering simple amusement to providing active, high-level skill progression. This is exactly where professional sports training attractions bridge the gap.

7 Sports Training Attractions That Draw More Visitors

From our experience working with top-tier facilities globally, investing in progressive training equipment fundamentally changes your business model. You stop relying on one-time birthday party sales and start selling dedicated practice time to passionate athletes, ambitious amateurs, and enthusiastic beginners who want to learn new extreme sports skills safely. In this comprehensive guide, we are detailing exactly which sports training attractions yield the highest return on investment, how the technology protects users, and why upgrading your park is a mandatory commercial decision.

Quick Summary Table: The Revenue Impact of Training Attractions

Attraction CategoryTarget DemographicPrimary Business ValueReplacement For
Freestyle Landing AirbagsBMX, Ski, Snowboard Teens & AdultsGenerates high-ticket monthly membershipsDangerous hard-deck ramps
Inflatable Gymnastics PitsCheerleaders, Gymnasts, ParkourEliminates daily maintenance costsUnsanitary traditional foam pits
Ninja Warrior CoursesCorporate Teambuilding, Fitness AdultsDrives local competition hosting revenueBasic static jungle gyms

Expert Verdict: For commercial users, replacing high-maintenance foam pits with zero-maintenance airbag systems provides the most immediate reduction in operational overhead while simultaneously attracting a highly dedicated extreme sports demographic.

What Are Sports Training Attractions?

Sports training attractions are commercial-grade facility installations engineered specifically for skill progression, athletic repetition, and high-impact energy absorption. Unlike standard bounce houses or toddler soft-play structures that are built for unstructured amusement, these systems are designed to simulate real-world physics. They allow athletes to practice complex, high-risk maneuvers repeatedly without the fear of blunt force trauma.

In most professional situations, a sports training attraction acts as a bridge between amateur enthusiasm and professional execution. These installations include advanced multi-chamber airbag capture systems, high-tension Olympic-grade trampolines, and custom-designed trackways for wheeled sports. The commercial distinction is vital: true sports training attractions are manufactured with industrial-grade PVC, continuous-flow blowers, and specialized shock-absorbing pillar technology designed to handle adult body weights falling from significant heights.

How They Work (And Why They Matter)

The core science behind these systems is kinetic energy management. When a rider or gymnast launches into the air, the landing surface must decelerate their mass smoothly. If the deceleration is too sudden, the user suffers impact injuries. If it is too soft, the user bottoms out against the hard floor beneath.

Advanced air-pillar technology vents air upon impact at a controlled rate, creating a soft, secure catch that conforms to the user’s body. Unlike static foam blocks that compress over time, break down into hazardous dust, and create a trampoline effect if landed on incorrectly, commercial air systems provide consistent, calculated resistance for every single jump. This matters immensely for your business because perceived safety directly correlates with user confidence. User confidence dictates how quickly they progress in their sport, and progression is exactly what keeps them paying for monthly memberships rather than single-day passes.

The 7 Sports Training Attractions That Draw More Visitors

1. Freestyle Airbag Landing Systems

Freestyle Airbag Landing

Freestyle Airbag Landing

For heavy-duty applications, nothing beats a specialized freestyle airbag setup. Skiers, snowboarders, skateboarders, and BMX riders actively seek out facilities that offer these massive landing zones. By providing a safe environment to attempt double backflips, off-axis spins, and complex grabs, you instantly capture the local extreme sports market—a demographic with high disposable income and an intense dedication to their craft.

Modern setups utilize multi-chambered technology to ensure the rider can land and instantly walk (or ride) off the pad. The throughput is massive. In our testing, an organized run-up to a commercial airbag can process hundreds of jumps per hour, maximizing your floor space profitability without creating frustrating lines. If you are operating an outdoor park or large warehouse, investing in a commercial FMX airbag landing system instantly elevates your facility to a regional training hub.

2. Inflatable Gymnastics Air Pits

Traditional foam pits in gymnastics centers and trampoline parks have become a significant liability. They are breeding grounds for staph infections and bacteria, require constant manual fluffing by your staff, and cost thousands of dollars to replace annually as the foam tears into hazardous micro-particles. The modern, commercially viable solution is the inflatable gymnastics air pit.

These units provide a firm but forgiving landing that mimics competition floor surfaces much closer than a sinkhole of foam blocks. Gymnasts need to land on their feet to build muscle memory; foam pits swallow the athlete, preventing proper landing mechanics. Transitioning to air technology is not just about safety; it is about providing a superior training environment.

Inflatable Gymnastics Air Pit by Sunparkairbag

Featured Attraction: Inflatable Gymnastics Air Pit

We highly recommend replacing aging, unhygienic foam blocks with this high-performance, easy-to-maintain training surface manufactured by Sunparkairbag.

  • Material Specifications: 0.55mm PVC Tarpaulin for the main airbag, 0.9mm PVC Tarpaulin for the impact top sheet. Water-proof, flame-retardant, UV-protected, lead and phthalate free.
  • Dimensions: Fully customized to drop into your existing pit architecture.
  • Color & Branding: Available as per color sheet with full Digital, Silk-screen or UV Printing for facility branding.
  • Production Lead Time: Approximately 15 working days, depending on size and order volume.
  • Manufacturing Standard: Our technicians possess over 5 years of specialized experience in commercial airbag heat-welding.
  • Included Accessories: Commercial continuous-flow blower, professional repair kit, heavy-duty carrying bag.

3. Mountain Bike & Dirt Bike Jump Tracks

The action sports demographic is chronically underserved by traditional indoor parks. If you have outdoor space or a massive indoor warehouse, building a structured jump track with an integrated landing system is highly lucrative. Riders will pay premium membership fees to practice year-round, regardless of weather conditions. When catering to this demographic, standard trampolines are useless. You must look into specialized bike airbag landing systems that are engineered to withstand the sharp pedals and heavy frames of bicycles.

Furthermore, if you intend to allow motorized vehicles, you cannot cut corners. You must invest in a dedicated, high-impact dirt bike airbag landing pad. The weight requirements, impact velocity, and exhaust heat considerations are vastly different from human-only attractions, requiring much thicker top sheets and aggressive air venting systems.

4. Ninja Warrior Obstacle Courses

The television popularity of extreme obstacle course racing has created massive consumer demand for Ninja Warrior setups. These are fantastic sports training attractions because they naturally encourage repeat visitation; users obsess over beating their previous completion times. From warped walls and spider climbs to salmon ladders, these courses require genuine strength, agility, and stamina.

To protect users from unpredictable falls from high bars, specialized padding and custom-fitted base airbags are strictly non-negotiable beneath these rigorous structures. Unlike a foam pit, a flat airbag base allows a fallen competitor to stand up and walk off the course in seconds, keeping the queue moving.

5. High-Performance Trampoline Zones

A standard trampoline park features tightly interconnected beds that offer very little bounce height. While this is safe for toddlers, it is completely useless for serious athletes. By isolating a specific, restricted zone and installing high-performance, Olympic-grade trampoline beds, you attract parkour practitioners, competitive gymnasts, and wakeboarders looking for aerial spatial awareness training.

Working with top-tier trampoline park equipment manufacturers ensures your beds provide the tension, spring length, and frame durability required to safely launch adult athletes performing complex twisting maneuvers.

6. Interactive Climbing Walls

Bouldering and sport climbing have exploded in mainstream popularity over the last decade. By adding augmented reality (AR) projectors or interactive, touch-sensitive light-up holds to a climbing wall, you merge physical training with modern gamification. Climbers can track their progress on an app, play vertical games like ping-pong with their hands, and compete globally. This transforms a static, intimidating wall into a highly engaging sports training attraction that appeals equally to complete beginners and seasoned climbers.

7. Foam Pit Alternatives (Airbag Upgrades)

If you currently operate a massive foam pit, you are actively losing money on maintenance labor and hygiene management. In any professional foam pit vs airbag comparison, the operational advantages of the airbag win decisively every single time. An upgraded air capture system allows users to bounce off or walk off the landing instantly. Conversely, foam pits trap users, creating massive operational bottlenecks where one jumper takes two minutes to crawl out while fifty people wait in line. High throughput equals higher customer satisfaction, better online reviews, and greater capacity for ticket sales.

Pros and Cons of Professional Training Equipment

Upgrading your facility from casual play gear to professional sports training attractions is a major capital expenditure. Here is exactly what you need to consider before signing a purchase order.

Pros of Commercial Training AttractionsCons of Commercial Training Attractions
Dramatically increases repeat visitor rates and allows for monthly membership models.Requires a higher initial capital investment compared to basic soft-play gear.
Attracts a dedicated, high-paying demographic (action sports athletes, teens, adults).May require you to negotiate customized insurance policies for extreme sports.
Airbag systems drastically reduce daily maintenance, cleaning labor, and replacement costs.Requires significantly more ceiling clear-height and square footage.
Creates highly shareable social media content, serving as powerful organic marketing.Staff must be specifically trained to monitor and enforce high-risk maneuver protocols.
Provides a vastly superior hygiene profile compared to traditional foam blocks.Continuous blower operation requires a reliable, dedicated power infrastructure.

Attraction Comparison Table: Operational Metrics

To help you make an informed commercial decision, our industry testing has broken down the operational metrics of the most common installations.

Attraction TypePrimary Target DemographicDaily Maintenance LevelThroughput (Users/Hr)Facility ROI Potential
Freestyle Airbag LandingBMX, Skate, Ski, SnowboardVery LowHigh (Fast exit times)Excellent (Draws out-of-town niche crowds)
Gymnastics Air PitGymnasts, Cheer Teams, ParkourVery LowMediumHigh (Secures lucrative team bookings)
Ninja Warrior CourseKids, Teens, Fitness AdultsMedium (Hardware checks)MediumHigh (Strong repeat challenge value)
Traditional Foam PitCasual General PublicExtremely High (Fluffing/Cleaning)Low (Extremely slow exit)Poor (High hidden labor costs)
High-Performance TrampolineAcrobats, Extreme AthletesMedium (Spring checks)MediumGood (Strong niche appeal)

Benefits and Limitations

The primary benefit of utilizing true sports training attractions is absolute market differentiation. If three generic trampoline parks exist in a ten-mile radius, the one equipped with an FMX landing airbag for sale setup or an interactive ninja course will completely dominate the older demographic and the athletic community. Families will drive past your competitors to reach the facility that offers actual skill progression. Furthermore, the operational efficiency of airbags limits staff intervention; users exit the landing zone in seconds without needing a lifeguard to drag them out of foam blocks.

The main limitation is spatial engineering. You cannot squeeze a proper mountain bike ramp and safety airbag into a low-ceiling retail space. These attractions require warehouse-scale clear heights—often 20 feet or more for extreme sports. Additionally, the initial capital outlay can be intimidating for new business owners. While you can look into our best airbag landing systems 2026 review to find budget-friendly options, never compromise on safety certifications to save a few dollars.

Who Should Use Them (And Who Does Not Need Them)

Who should use them: Commercial extreme sports centers, gymnastics training facilities, upgraded trampoline parks, ski resorts, and dedicated BMX tracks must integrate these attractions to survive the next decade. For commercial users, the ROI justifies the cost within the first 12 to 18 months through increased ticket prices, monthly memberships, and the ability to host specialized training camps.

Who does not need them: If you operate a soft-play center strictly designed for toddlers and children under seven years old, heavy-duty sports training attractions are an over-investment. Young children simply do not generate enough kinetic force or velocity to require 0.9mm PVC airbag capture systems. Standard padded EVA flooring and small residential-grade inflatables are sufficient and safer for that specific, low-impact business model.

Common Mistakes Facility Owners Make

In our experience, the most devastating mistake a facility owner can make is purchasing residential-grade equipment for a commercial environment. A cheap backyard airbag from a non-specialized vendor will rupture under the continuous daily stress of a commercial skatepark, causing catastrophic injuries and immediate lawsuits.

Second, facility owners often miscalculate the run-up and run-out space needed. A sports training attraction is useless if the user does not have enough speed to hit the ramp properly, or if they fly off the end of the airbag because the catch zone is too short. Always consult the manufacturer regarding safe jump trajectories.

Finally, ignoring the visual branding is a massive missed opportunity. Your equipment should feature your logo heavily. When athletes film their tricks and post them to TikTok or Instagram, your customized training attraction acts as a massive, free billboard. Always opt for UV or digital printing on your top sheets.

Commercial Buying Considerations

When procuring sports training attractions, prioritize manufacturing transparency above all else. We recommend demanding proof of material specifications before signing a contract. For heavy-duty applications, ensure the manufacturer uses at least 0.55mm PVC Tarpaulin for the inner bladders and 0.9mm PVC Tarpaulin for the impact top sheets to withstand constant abrasion. Verify that the materials are flame-retardant, UV-protected, and strictly free of toxic lead and phthalates. Partnering with established, reputable brands like Sunparkairbag ensures your equipment meets the rigorous demands of commercial liability insurance.

Sunparkairbag Expert Recommendation

We firmly believe that the era of the basic foam pit and the flat trampoline court is over. For facilities looking to dominate their local market in 2026 and beyond, transitioning to air-supported training infrastructure is absolutely non-negotiable. Long-term profitability is rooted in low maintenance and high throughput.

We strongly recommend starting your facility upgrade by replacing your dirtiest, most problematic foam pit with a custom Inflatable Gymnastics Air Pit. The immediate reduction in cleaning labor and the instant boost in user satisfaction will prove the business case. Once you see the ROI from that single upgrade, expanding into freestyle airbags and ninja courses becomes an easy financial decision.

Frequently Asked Questions (FAQ)

Are sports training attractions profitable for indoor parks?

Yes, highly profitable. By upgrading to professional sports training attractions, facilities attract an older, dedicated demographic that pays for recurring memberships, private coaching, and specialized event access. This vastly outperforms the unpredictable, one-time ticket sales of standard play equipment.

How long does a commercial airbag landing system last?

With proper maintenance and indoor use, a heavy-duty commercial PVC airbag can last 5 to 8 years. The top impact sheets are designed to be easily replaceable, meaning you only need to swap the top layer when it shows wear, extending the lifespan of the main base unit significantly without repurchasing the whole system.

Do I need specialized insurance for extreme sports attractions?

Yes. In most professional situations, offering advanced sports training attractions like BMX jump tracks requires specialized liability underwriting. However, installing certified, industry-standard safety equipment like professional airbag systems often helps negotiate much better premium rates compared to operating unregulated foam pits.

How much electricity do continuous blowers consume?

Commercial blowers typically run between 1.5 to 2.0 HP. While they run continuously during operating hours, the energy cost is minimal compared to the labor costs associated with cleaning, fluffing, and replacing foam pit blocks. The electrical overhead is easily offset by increased ticket throughput.

Authoritative References

To ensure industry compliance, facility safety, and proper business planning, we advise facility owners to familiarize themselves with the following authoritative bodies regarding sports training attractions:

  • ASTM International: Provides essential engineering standards and safety protocols for the design, manufacture, and operation of trampoline courts and commercial amusement devices.
  • US Consumer Product Safety Commission (CPSC): Offers critical baseline safety guidelines, injury reporting statistics, and material safety compliance protocols for indoor recreation facilities.
  • Forbes Business Council: Features critical economic insights on how the transition to experience-based retail and specialized athletic training facilities drives modern consumer spending.
5 MTB Freestyle Training Methods Used by Professionals

5 MTB Freestyle Training Methods Used by Professionals: An Expert Guide

The era of learning mountain bike freestyle tricks by simply launching off a dirt lip and hoping for the best is entirely over. In the modern landscape of extreme sports, professional riders execute triple backflips and highly technical tailwhips with mechanical precision. This level of progression is not achieved through raw courage; it is the direct result of engineered, highly specific MTB Freestyle Training Methods. If you are an athlete attempting to progress, or a commercial facility manager designing a bike park, ignoring these established training protocols will inevitably result in catastrophic injuries and massive operational liabilities.

5 MTB Freestyle Training Methods Used by Professionals

From our experience manufacturing the world’s most advanced safety infrastructure at SUNPARK® AIRBAG, we have watched the industry transition from dangerous backyard setups to highly controlled, data-driven training facilities. Attempting a cashroll on hard-packed dirt before mastering spatial awareness in a controlled environment is commercial and physical suicide. In this uncompromising guide, we will break down the 5 definitive MTB Freestyle Training Methods utilized by professional athletes today. We will explain the mechanics of each method, establish whether they are actually worth your time and capital investment, and provide the ultimate roadmap for safe, rapid progression.

Quick Answer: The Hierarchy of Progression

Professional riders utilize a strict sequence of MTB Freestyle Training Methods to mitigate risk while learning high-consequence tricks. The five standard methods are:

  1. Trampoline Bike Training: Used for developing initial spatial awareness and muscle memory without the risk of heavy impacts.
  2. Foam Pits: The traditional method for attempting a rotation for the very first time, though highly outdated for landing mechanics.
  3. Mulch/Bark Ramps: A natural, low-cost outdoor stepping stone, but notoriously inconsistent in impact attenuation.
  4. Resi Ramps (Resin/Rubber over Foam): Excellent for learning to ride out of a trick, but still carries a significant risk of abrasion and joint compression.
  5. Inflatable Airbag Landings: The undisputed gold standard. A professional MTB airbag landing system allows riders to attempt massive tricks safely and physically ride out of the landing if successful.

In most professional situations, we recommend bypassing foam pits entirely and investing directly in an adjustable inflatable airbag system, as it provides the most realistic kinesthetic feedback with the lowest injury threshold.

What Are MTB Freestyle Training Methods?

MTB Freestyle Training Methods are structured, progressive mechanical systems designed to separate the execution of an aerial maneuver from the consequence of a failed landing. When a rider is fifty feet in the air, the brain’s natural self-preservation instinct often triggers panic, leading to “dead-sailoring” (freezing mid-air) or abandoning the bicycle. These specific training methods utilize advanced materials—from trampolines to highly engineered pneumatic textiles—to trick the brain into a state of confidence. By removing the fear of a hard-dirt impact, the rider can focus entirely on the biomechanics of the trick.

How They Work: The 5 Professional Methods

1. Trampoline Bike Training (Spatial Awareness)

Before a professional rider takes a trick to a massive dirt jump, they strip a BMX or lightweight MTB frame of its wheels, chain, and sharp edges. They wrap the frame in foam and take it to an Olympic-grade trampoline. This is the foundational tier of MTB Freestyle Training Methods. It allows the rider to build pure muscle memory for barspins, tailwhips, and off-axis rotations without the cardiovascular fatigue of pedaling up to a jump. It is cheap, highly effective, but offers zero translation to forward-momentum landings.

2. The Foam Pit (The Outdated Classic)

For decades, the foam pit was the pinnacle of extreme sports training. A rider hits a wooden kicker and lands in a massive concrete basin filled with polyurethane foam blocks. While it prevents broken bones on impact, it is commercially and practically flawed. Foam pits are unhygienic fire hazards that require constant maintenance. More importantly, when a rider lands in a foam pit, the bike stops instantly, causing the rider to fly over the handlebars into the foam. It teaches terrible landing habits because you cannot physically “ride away” from a trick.

3. Mulch and Bark Landings (The Natural Alternative)

For heavy-duty applications in outdoor forest environments, trail builders pile massive mounds of soft, decaying wood mulch over a dirt landing base. When evaluating MTB Freestyle Training Methods, mulch is the budget-friendly stepping stone. If you crash, the mulch displaces, absorbing some impact. However, in our testing, mulch is wildly inconsistent. If it rains, it compacts into solid concrete. If it dries out, it turns to dust. It is not a reliable long-term safety solution.

4. Resi Ramps (The Middle Ground)

A “Resi” is a layer of thick rubber matting stretched tightly over a bed of dense foam blocks, laid upon a wooden landing structure. Resi ramps changed the industry because they are firm enough to allow a rider to land a trick and ride down the transition, but soft enough to absorb a direct bodily impact if the rider falls. However, sliding down a rubber mat at 30 MPH results in severe friction burns, and the impact attenuation is not sufficient for massive, 40-foot drops.

5. Inflatable Airbag Landings (The Gold Standard)

The absolute apex of modern MTB Freestyle Training Methods is the landing airbag solutions utilized by world champions. These are not massive, flat stunt-man cushions. Modern bike airbags are shaped to perfectly mimic the angle and transition of a dirt landing. Constructed from 0.55mm to 0.9mm Plato PVC tarpaulin, these systems feature internal venting chambers. When a rider lands perfectly, the bag provides enough rigidity to ride away cleanly. If the rider crashes, the internal pillars collapse, absorbing the kinetic energy completely. It is the only system that forgives errors while actively rewarding perfection.

The Commercial and Practical Benefits

The commercial benefits of implementing elite MTB Freestyle Training Methods are profound. For bike parks and action sports facilities, installing inflatable MTB airbag solutions immediately drives ticket sales. Riders will travel across the country to pay for access to a safe progression facility.

Practically, these methods keep athletes out of the hospital. In professional mountain biking, a shattered collarbone means a lost season, lost sponsor bonuses, and potentially the end of a career. Airbags function as an insurance policy for the human body, allowing riders to attempt the impossible dozens of times a day with zero physical degradation.

Limitations and Hard Truths

We must present practical judgment: elite MTB Freestyle Training Methods are incredibly expensive and require significant operational logistics. A commercial-grade airbag landing setup requires constant electrical power to run the inflation blowers. If you lose power mid-jump, the bag deflates.

Furthermore, airbags are susceptible to vandalism and extreme weather damage if not properly covered or deflated and stored. They require a massive footprint, and the initial capital expenditure for a big jump airbag system can exceed tens of thousands of dollars. It is not an impulse purchase; it is a heavy infrastructure investment.

Who Should Use These Methods

We recommend professional MTB Freestyle Training Methods for competitive slopestyle athletes, freeride professionals, traveling stunt shows, and commercial action sports facilities. If you are running an indoor extreme sports park, integrating a bike airbag landing next to your gymnastics airbag equipment provides the ultimate multi-disciplinary training environment.

Who Does Not Need Them

For beginners who are just learning how to pedal, brake, and navigate basic singletrack trails, these setups are wildly unnecessary. If your goal is cross-country endurance riding or casual weekend trail cruising, you do not need to invest time in a foam pit or an airbag. Focus on core bike handling skills on dirt before you ever look at an aerial training facility.

Common Mistakes in Freestyle Progression

Expert Insight: The most catastrophic mistake we see in extreme sports progression is the “Airbag Trap.” Riders will learn a double backflip perfectly on a soft, forgiving flat airbag, but they fail to learn how to spot a physical, angled dirt landing.

When these riders transition to a hard dirt jump, they over-rotate and crash violently because they never learned transition mechanics. This is exactly why SUNPARK engineered the shaped landing airbag. You must train on an airbag that mimics the exact slope of the dirt jump you intend to hit. If you only practice on flat stunt airbag landing mats, your transition to dirt will be highly dangerous.

Expert Buying Considerations for Facilities

If you are a commercial buyer tasked with procuring equipment to support MTB Freestyle Training Methods, do not buy cheap, unbranded inflatables. A seam failure during a landing is a massive liability. You must demand the following specifications:

  • Material Certification: The airbag must be constructed from heavy-duty, fire-retardant Plato PVC tarpaulin (minimum 0.55mm for topsheets, 0.9mm for high-wear zones).
  • Air Pillar Technology: Avoid “open bladder” airbags that bounce riders back into the air. Demand independent internal air pillars that absorb impact and slowly vent air.
  • Adjustable Venting: The facility manager must be able to adjust the firmness of the bag. A soft setting for beginners learning to crash, and a firm setting for pros learning to ride out.
  • Custom Top Sheets: The landing area should feature a replaceable top sheet so that when bicycle tires inevitably wear down the fabric, you replace a $500 sheet instead of a $15,000 airbag.

Summary and Comparison Tables

Quick Summary Table: Effectiveness of Training Methods

Training MethodPrimary FunctionSafety Rating
Trampoline BikeMuscle memory and spatial awareness.Very High
Foam PitFirst attempts at complex rotations.High (But poor ride-out habits)
Mulch LandingLow-cost outdoor transition step.Low / Moderate
Resi RampPracticing ride-out mechanics.Moderate (High friction risk)
Inflatable AirbagTotal progression with ride-out capability.Very High

Comparison Table: Foam Pit vs. Resi Ramp vs. Shaped Airbag

FeatureTraditional Foam PitResi RampSUNPARK Shaped Airbag
Ride-Out CapabilityZero (You sink instantly)Good (Firm surface)Excellent (Adjustable firmness)
Maintenance LevelExtremely High (Foam degrades)Moderate (Rubber tears over time)Low (Wipe clean, patch kits)
Injury Risk on ImpactLowModerate (Impact & Burn risk)Extremely Low
HygieneVery Poor (Absorbs sweat/dirt)GoodExcellent (Non-porous PVC)

Pros and Cons of Commercial Airbag Training

Pros (Advantages)Cons (Limitations)
Provides the most realistic dirt-landing simulation available.High initial capital investment required for commercial parks.
Drastically reduces severe injuries and facility liability.Requires continuous electrical power for continuous blower operation.
Adjustable pressure accommodates both pros and beginners.Large physical footprint requires significant real estate.
Draws massive crowds and paying customers to facilities.Susceptible to damage from sharp, untaped bicycle pedals or pegs.

Expert Recommendation: SUNPARK Airbag

In most professional situations, cutting corners on safety infrastructure is the fastest way to ruin an athlete’s career or a commercial facility’s reputation. If you are serious about implementing the finest MTB Freestyle Training Methods in the world, you must source your equipment from an established, vertically integrated manufacturer.

SUNPARK® AIRBAG Custom Airbag Manufacturer

SUNPARK® AIRBAG Custom Airbag Manufacturer

With over 10 years of experience, we provide freestyle airbags for ski resorts, theme parks, sports, and gymnastics facilities around the globe. SunparkAirbag® is the leading manufacturer of Airbags for Extreme Sports and Leisure Industries in China.

As extreme sports developed, more and more snowboarders and serious sports enthusiasts are looking for safer training possibilities to progress without risks of getting injured. We create the products for World Champion athletes, famous riders, and trampoline parks worldwide. We are deeply committed to the development and improvement of our own products.

Explore Custom Airbag Solutions

Whether you require a custom Halfpipe Airbag for winter sports or a massive gap-jump setup for a summer bike festival, relying on generic importers is a profound mistake. Trust the engineers who build the equipment that the professionals trust their lives with.

Frequently Asked Questions (FAQ)

What is the safest MTB Freestyle Training Method for learning backflips?

The absolute safest progression begins with a trampoline bike to learn the physical rotation mechanics, followed directly by an inflatable shaped airbag landing. The airbag allows you to attempt the rotation with the actual weight of the bike, absorbing the impact if you under-rotate, while still allowing you to ride away if you land perfectly on the wheels.

Are foam pits still used in modern MTB training?

While some older facilities still maintain foam pits, they are rapidly being phased out by professional athletes and commercial parks. Foam pits are highly unhygienic, expensive to clean, and they teach riders to simply “chuck” a trick without preparing for a realistic ride-out landing. Shaped airbags have entirely rendered them obsolete.

Do I need to modify my bike before jumping onto an airbag?

Yes. In most professional situations, facilities require riders to tape up sharp metal pedals, remove metal bar ends, and ensure there are no sharp, jagged zip-ties or broken cables on the bike. While commercial airbags like SUNPARK use heavy-duty Plato PVC, mitigating sharp metal impacts drastically extends the lifespan of the airbag’s top sheet.

Authoritative Industry References

To ensure our safety protocols and training methodologies align with global standards, we reference data and guidelines from the following authoritative bodies:

  • Union Cycliste Internationale (UCI): The world governing body for sports cycling, establishing standards for BMX and MTB freestyle event safety and infrastructure. Visit UCI
  • American College of Sports Medicine (ACSM): The leading authority on sports medicine, providing peer-reviewed research on injury prevention, impact attenuation, and safe progression in extreme sports. Visit ACSM
  • Red Bull Bike: A premier resource for professional training insights, documenting the exact progression facilities and methodologies utilized by world-champion freeride athletes. Visit Red Bull Bike